Overview
To view and manage backup accounts:
Sign in to your account in the Dashboard.
Go to Endpoint Backup › Backup Accounts.
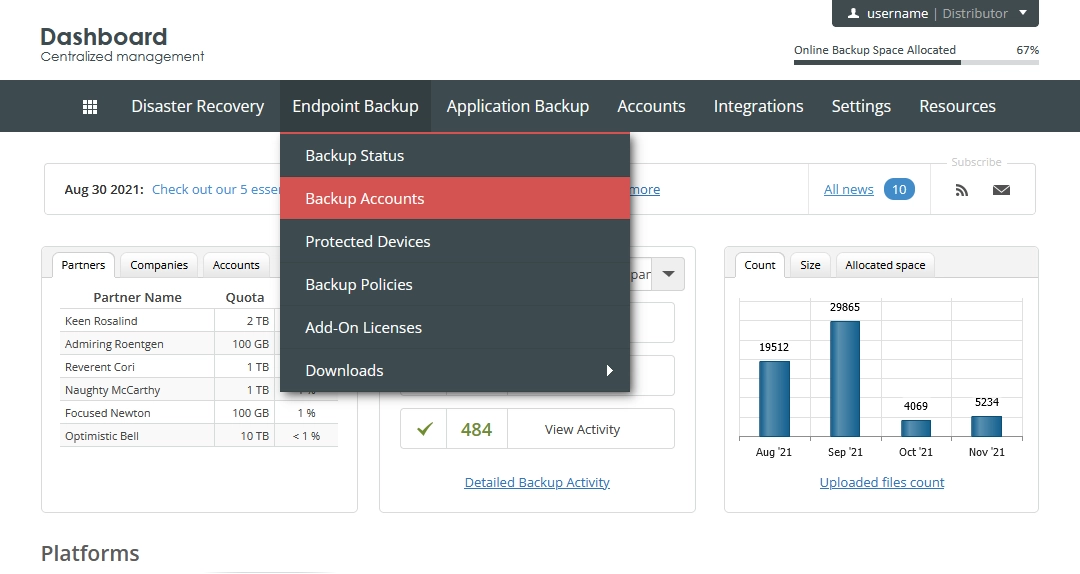
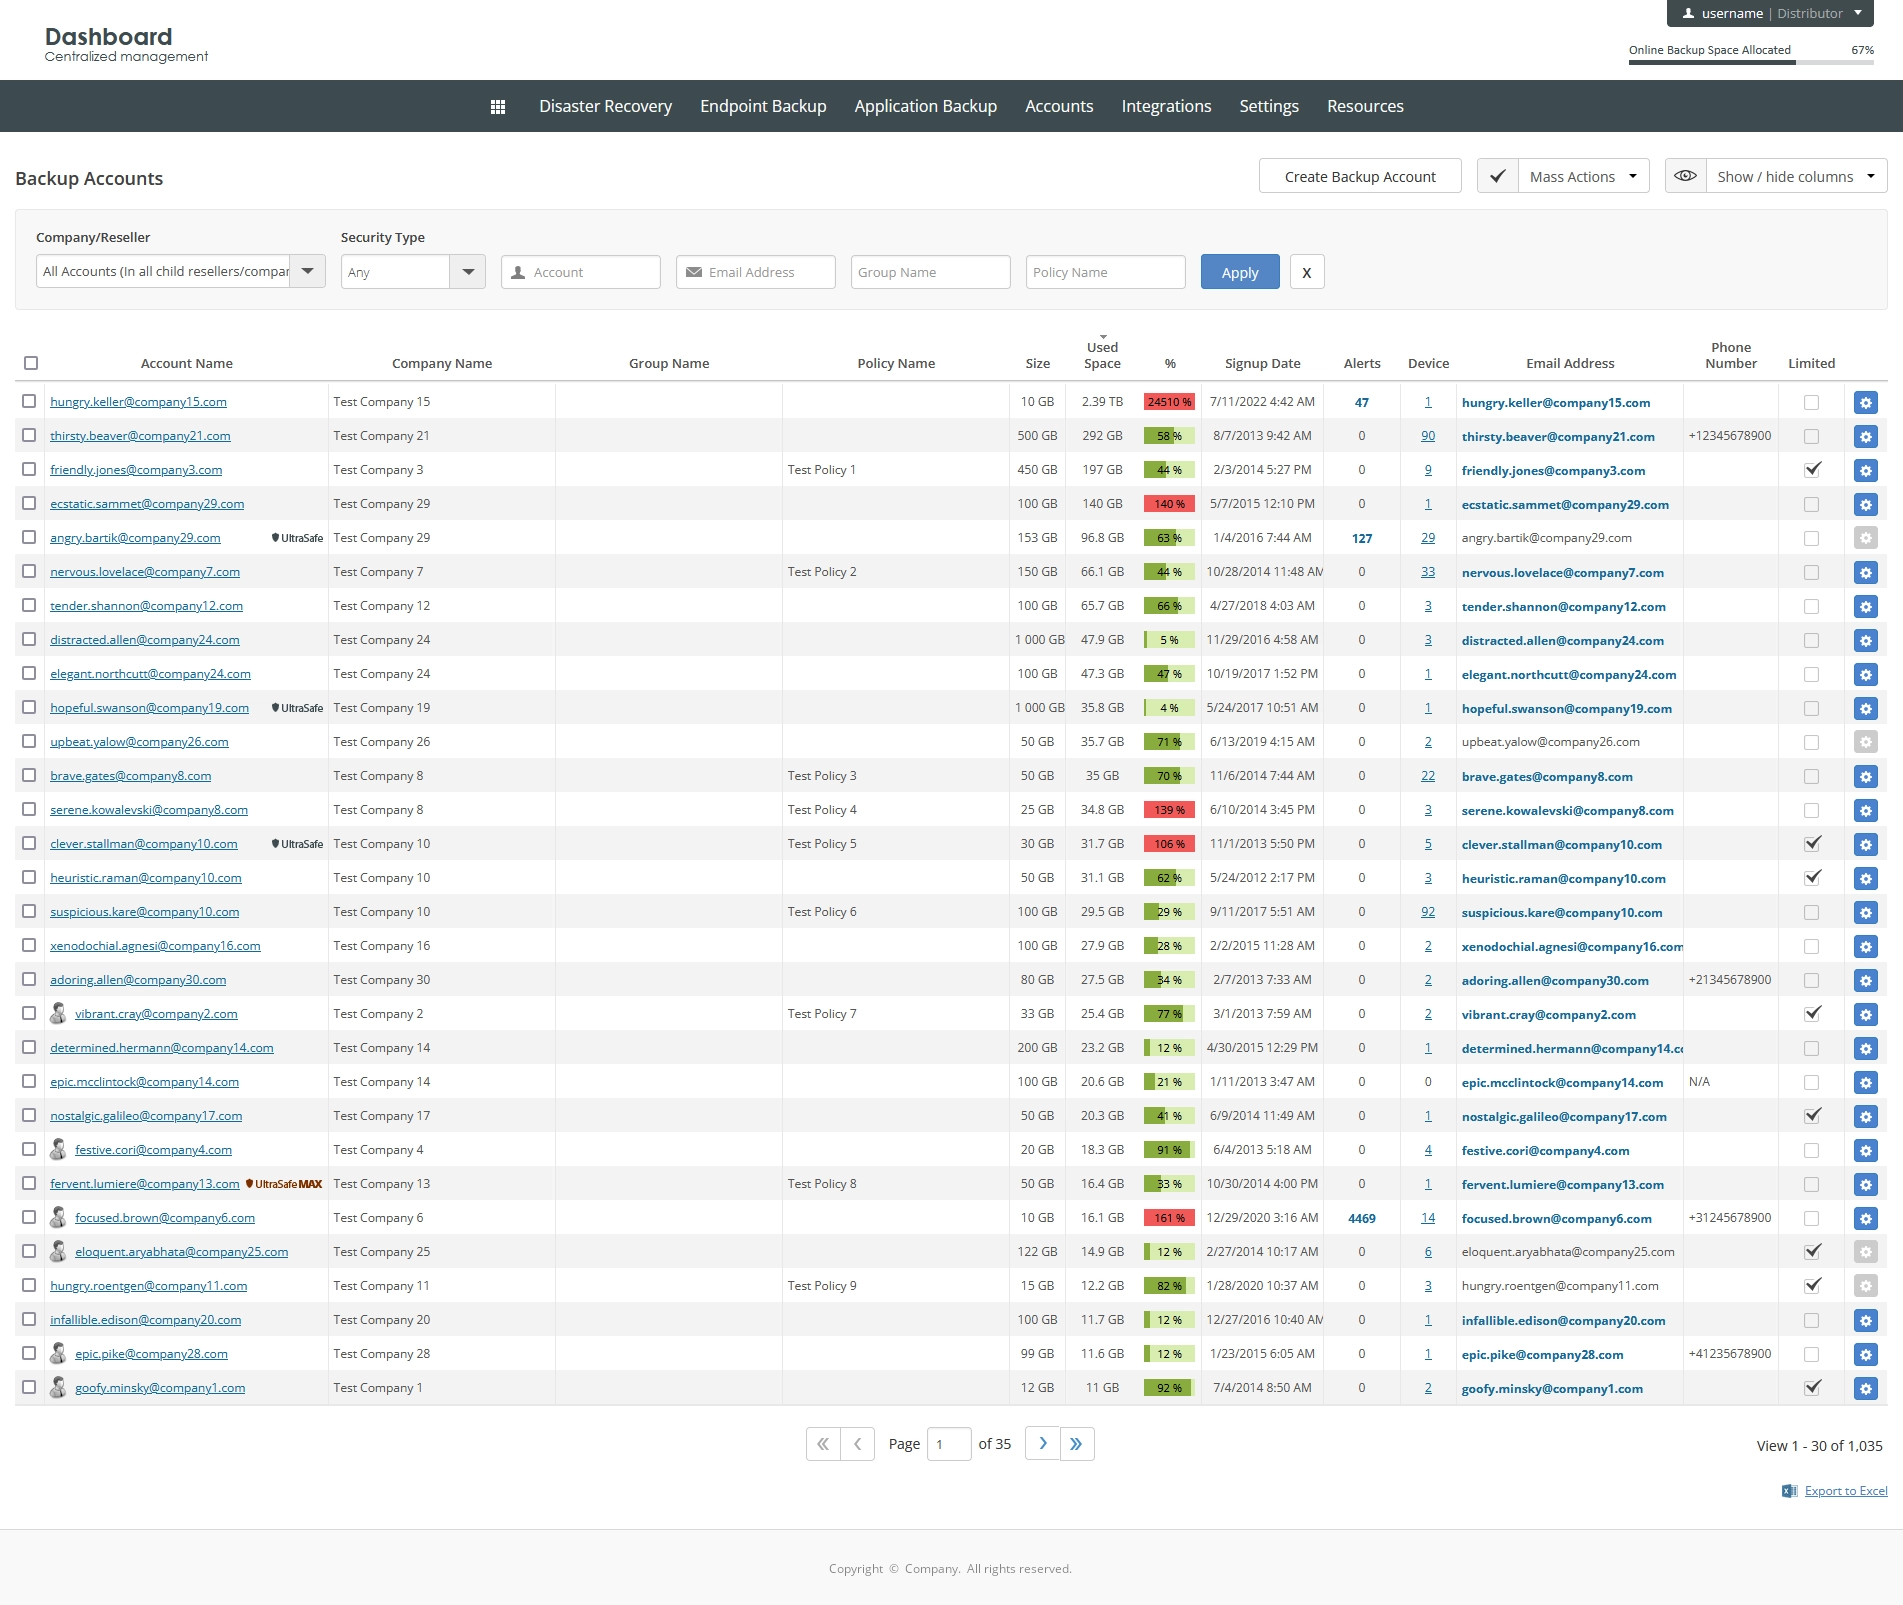
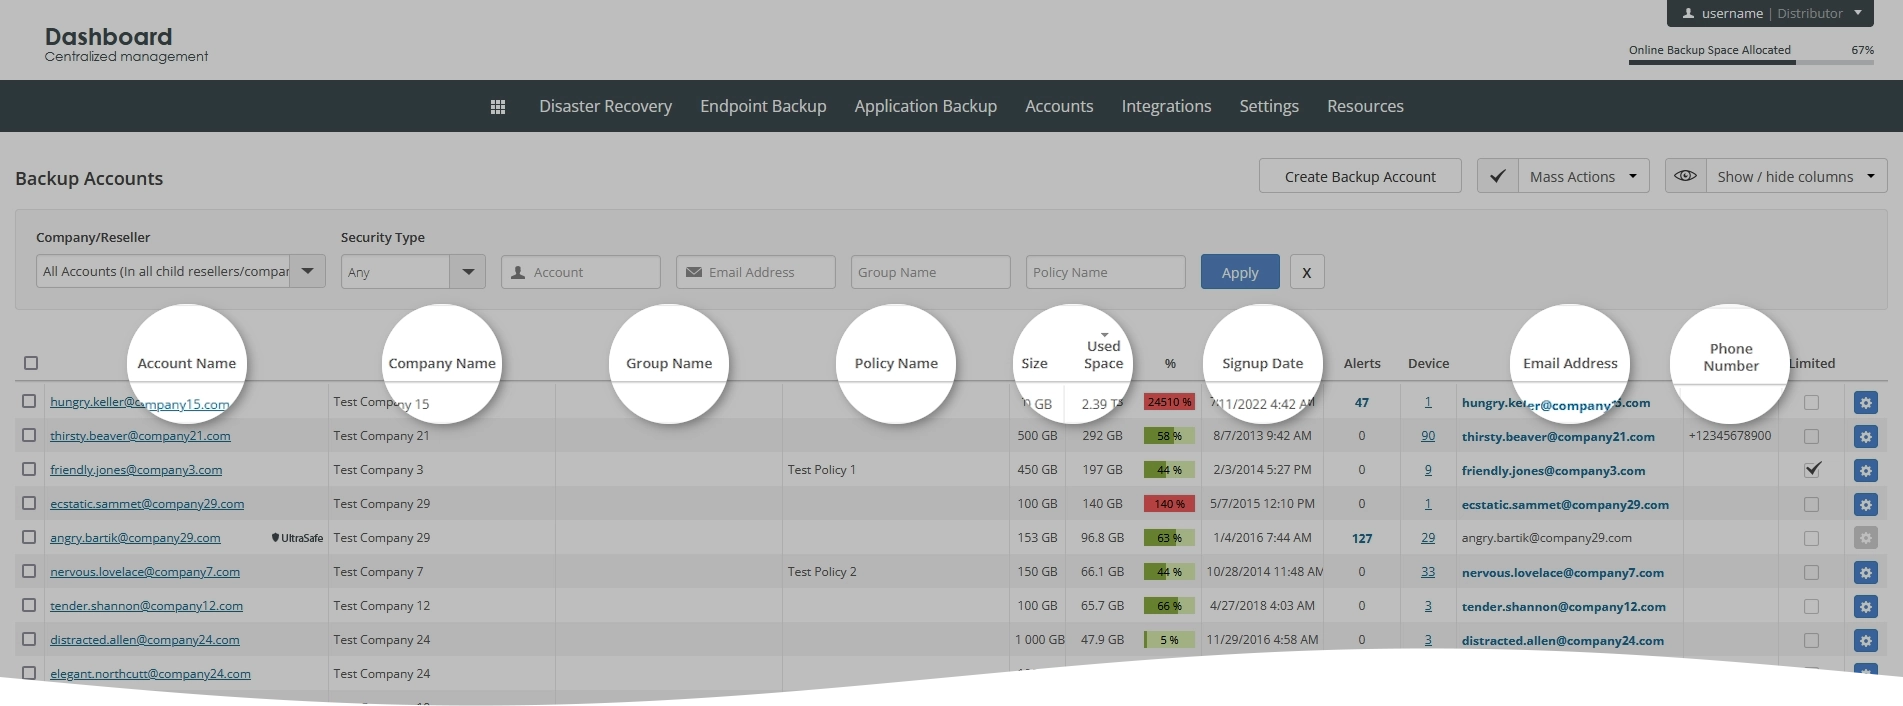
The consolidated backup accounts page opens.
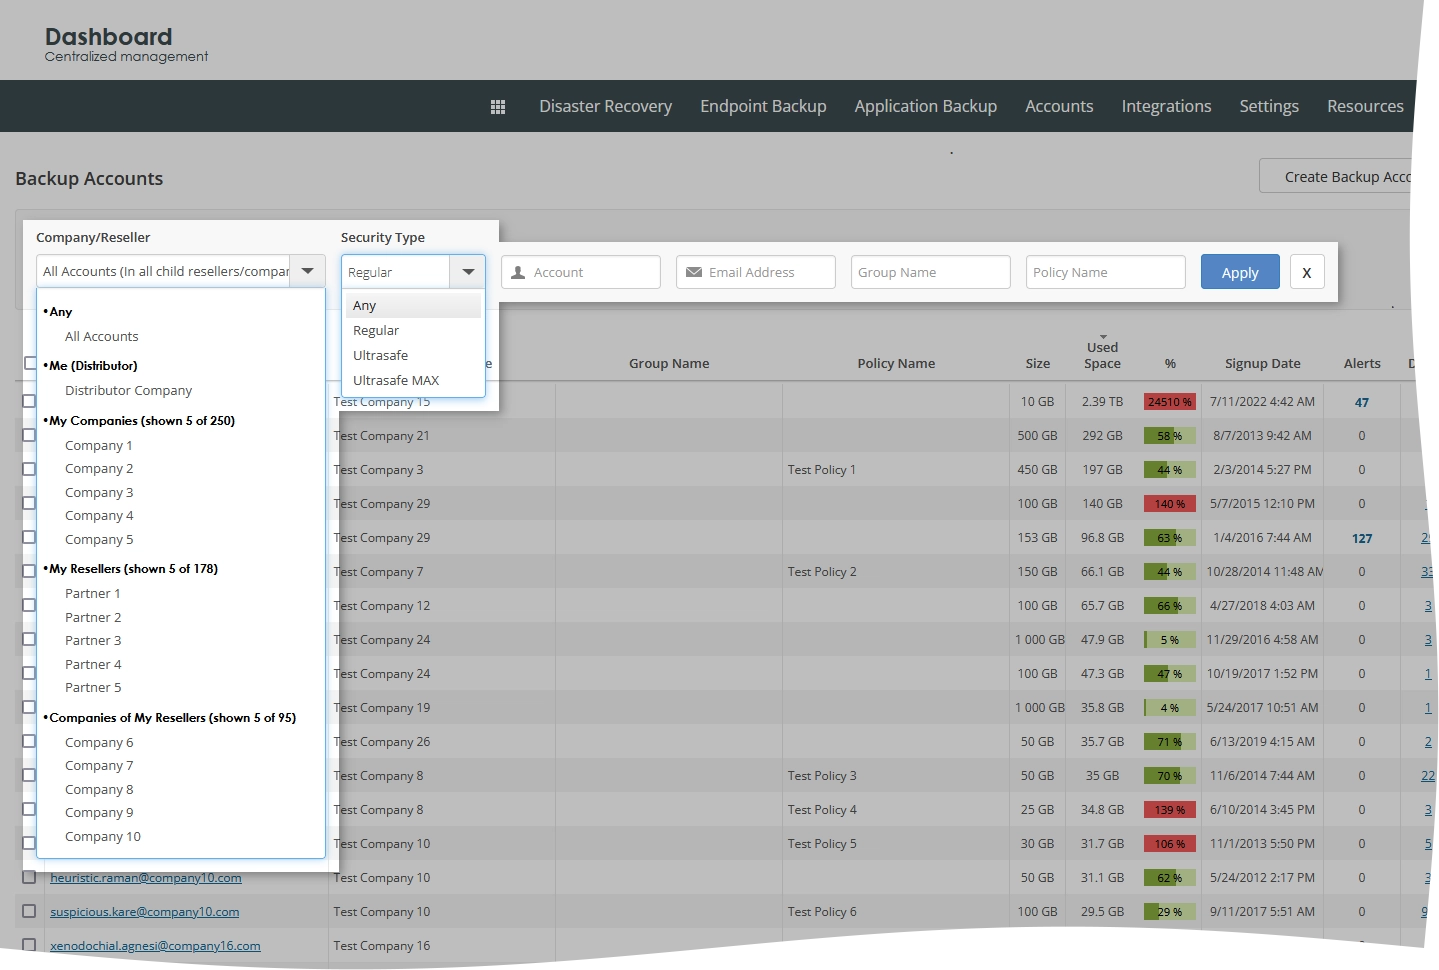
Information on the page is presented in the table format with the following columns:
| Column | Description |
|---|---|
| Account Name | Name of the backup account; as specified when creating the backup account. Click to view the details. |
| Company Name | Name of the company the backup account belongs to; as specified when creating the backup account |
| Group Name | Name of a user group the backup account belongs to. Backup accounts can be included in multiple user groups. |
| Policy Name | Name of a backup and retention policy assigned to the backup account. Backup accounts can have multiple policies assigned to them. |
| Size | Amount of space in the cloud (in GB) allocated to the backup account; as specified when creating the backup account |
| Used Space | Amount of space in the cloud (in GB) occupied by the backup data of the backup account. It is also designated as percentage of the total amount of cloud space (Size) allocated to the backup account. |
| Signup Date | Date when the backup account signed up |
| Alerts | Number of alerts and notifications regarding backups on the protected devices associated with the backup account |
| Device | Number of the protected devices associated with and used by the backup account. Click the number in the cell to go to the consolidated protected devices page and to view the details. |
| Email Address | Contact email address of the backup account; as specified when creating the backup account. Click to change the email address. |
| Phone Number | Contact phone number of the backup account |
| Limited | Indication if the backup account has limited rights; as specified when creating the backup account. You can change this. |
Individual actions
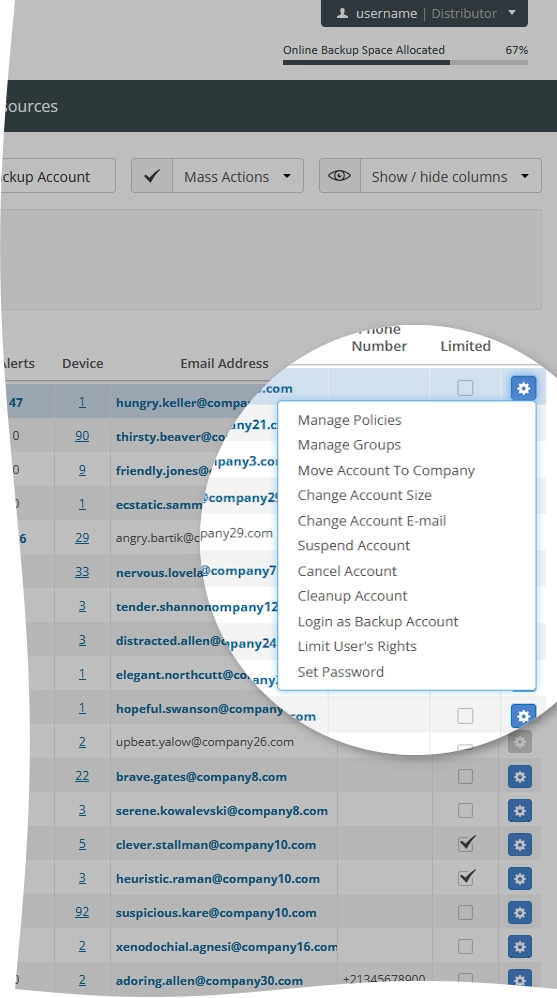
You can take actions on individual backup accounts shown on the page. For this, click Actions (![]() ) in the last column against a backup account record, and then click the desired action to take.
) in the last column against a backup account record, and then click the desired action to take.
| Action | Description |
|---|---|
| Manage Policies | Manage backup and retention policies for the protected devices associated with the backup account |
| Manage Groups | Manage user groups the backup account belongs to |
| Move Account To Company | Move the backup account to another company |
| Change Account Size | Change the amount of space in the cloud allocated to the backup account |
| Change Account E-mail | Change email address of the backup account |
| Suspend Account | Suspend the backup account |
| Cancel Account | Delete the backup account from the system |
| Cleanup Account | Delete old or unwanted backup data of the backup account from the cloud |
| Login as Backup Account | Sign in to the Dashboard as the backup account |
| Limit User’s Rights | Limit the rights of the backup account to perform certain operations |
| Give User Full Rights | Give the backup account full rights to perform certain operations |
| Set Password | Change password for the backup account |
| Make Company Administrator | Transform the backup account into the company administrator |
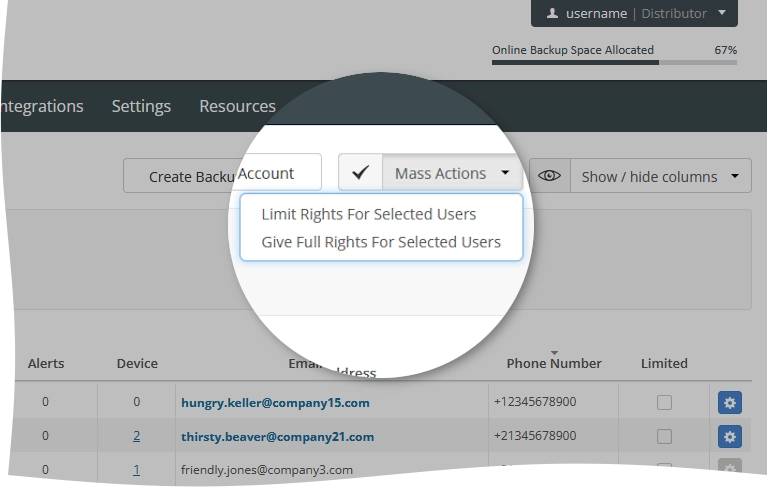
Mass actions
You can take actions on multiple backup accounts shown on the page at once. For this, select the backup accounts to take a mass action on, click Mass Actions on the upper right, and then click the desired action.
| Action | Description |
|---|---|
| Limit Rights For Selected Users | Limit the rights of the selected backup accounts to perform certain operations |
| Give Full Rights For Selected Users | Give the selected backup accounts full rights to perform certain operations |
Navigate
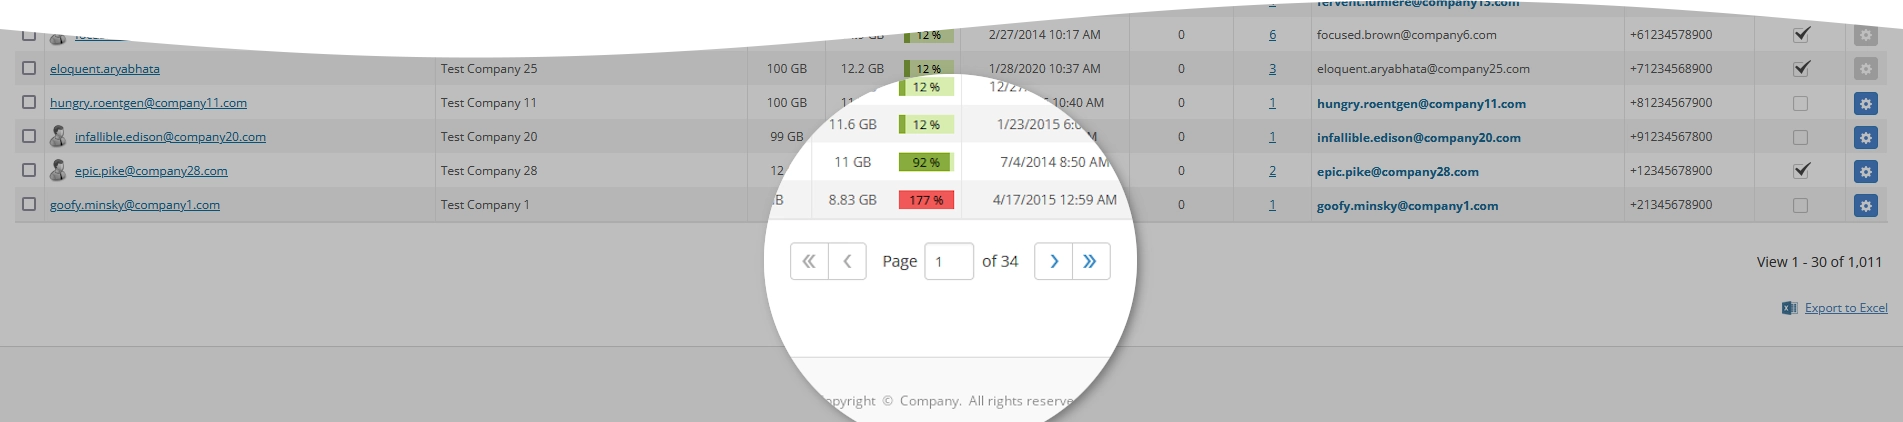
By default, the system shows 30 backup account records in the table per page. To browse over backup accounts, use the navigation buttons at the bottom of the page. Also, you can enter a number in the box, and then press Enter to go to the respective page.
| Name | Icon | Description |
|---|---|---|
| Next | Go to the next page | |
| Previous | Go to the previous page | |
| Last | Go to the last page | |
| First | Go to the first page |
Show or hide data
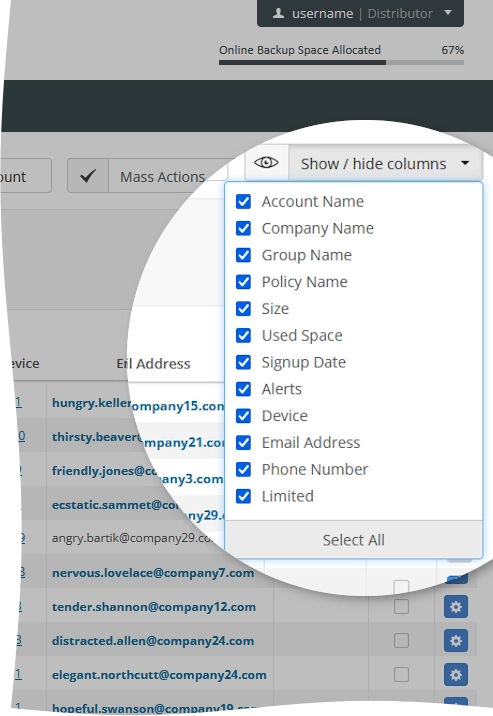
You can select what data to show on the page. For this, click Show / hide columns on the upper right, and then select or clear the columns you want to show or hide.
Sort data
You can sort backup accounts in the table in ascending or descending order by:
name of the backup account (Account Name),
name of the company the backup account belongs to (Company Name),
name of the user group the backup account belongs to (Group Name),
name of the backup and retention policy assigned to the backup account (Policy Name),
amount of space in the cloud allocated to the backup account (Size),
amount of space in the cloud occupied by the backup data of the backup account (Used Space),
date when the backup account signed up (Signup Date),
contact email address of the backup account (Email Address), or
contact phone number of the backup account (Phone Number).
For this, click the name of the corresponding column.
Filter data
You can filter backup accounts in the table by:
partner (Company/Reseller, for distributors only),
company (Company/Reseller, for distributors and partners),
security type of the backup account (Security Type),
name of the backup account (Account),
contact email address of the backup account (Email Address),
user group the backup account belongs to (Group Name), and
backup and retention policy assigned to the backup account (Policy Name).
For this, set the desired filters on the toolbar, and then click Apply.
To reset all filters at once, click Clear (![]() ) next to the filters on the toolbar.
) next to the filters on the toolbar.
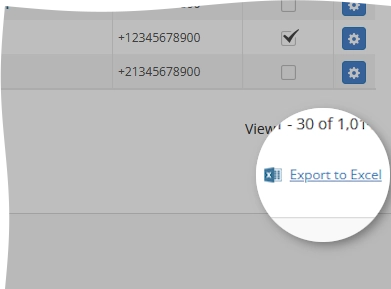
Export data
You can export all data (in all visible and hidden columns) regarding the backup accounts shown in the table to an XLS spreadsheet. For this, click Export to Excel on the lower right, and then save the file with the exported data to the desired location.