Prerequisites
DR backup agent supports the following Windows versions:
-
Windows 7 SP1 or later
-
Windows Server 2008 R2 SP1 or later
For proper operation of the DR backup agent, make sure to install the following software on the client:
-
Microsoft .NET Framework 4.6.2 or later
-
Microsoft Visual C++ for Visual Studio 2015, 2017 and 2019
Starting from IBDR 8.7, to establish connection between the protected client and the appliance, you must enable NTLMv2 authentication on the client.
On the clients running Windows 7 SP1 or Windows Server 2008 R2 SP1, the following Windows updates must be installed:
-
KB2999226
-
KB3033929
-
KB3035131
On the clients running Windows 8 or Windows Server 2012 R2, or later, the following Windows updates must be installed:
-
KB2919355
-
KB2919442
-
KB2999226
Regular installation
On the Windows client you want to back up:
-
Download the backup agent installer from the appliance Management Console (Settings › Tools › Downloads).
-
Run the downloaded installer, and follow the on-screen instructions.
After the backup agent is installed, it gets into the Waiting for pairing state, and waits 24 hours to receive the settings (password and port) from the appliance to establish connection.

For details on how to connect the DR backup agent with appliance, see Pair with appliance.
Silent installation
Backup agent installer supports the silent mode, that is when the installation runs in the background and does not require user interaction.
To install the backup agent on a client silently:
-
Open Command Prompt.
-
Enter
path-to-installer -quiet, wherepath-to-installeris the path to the backup agent installer.For example:
C:\Users\Default\Downloads\backup-client-8.5.0.104.Win32.x64.exe -quiet
Run 32-bit and 64-bit versions on one system
-
Add two clients for the same machine you want to back up.
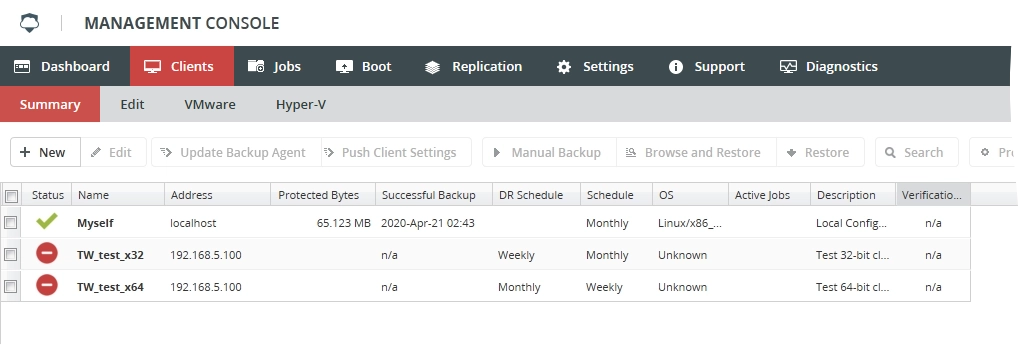
-
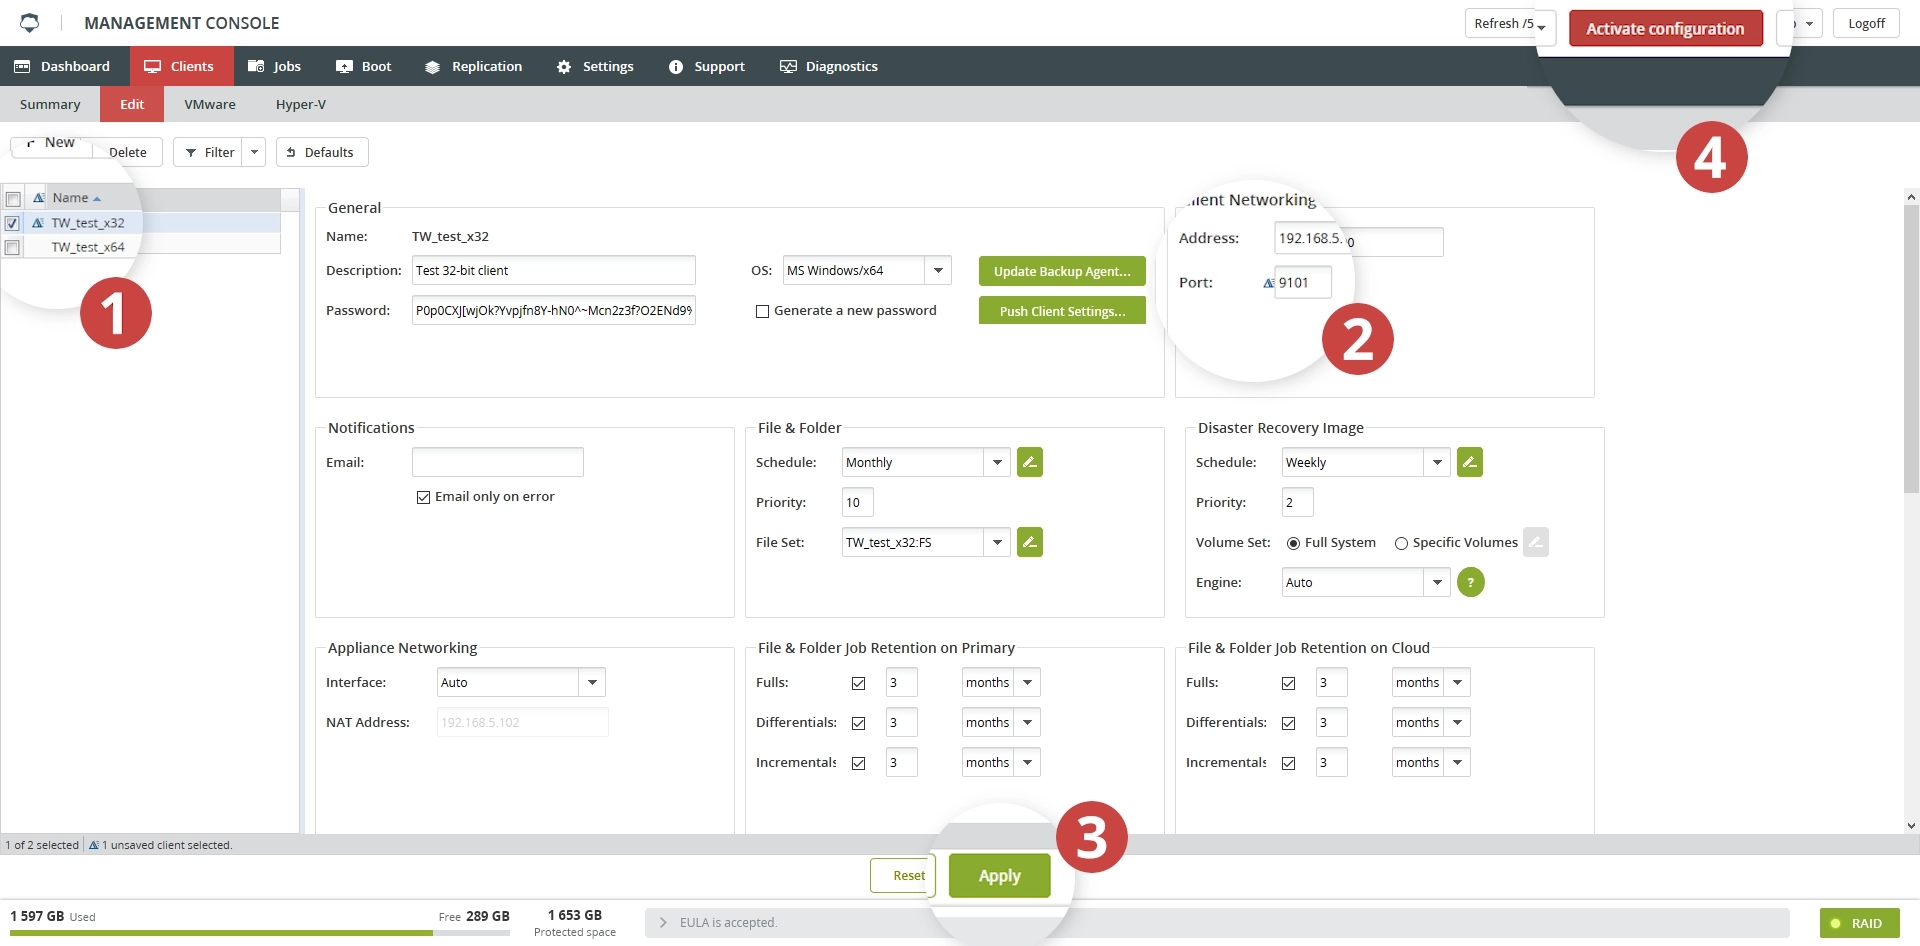
In the appliance Management Console, go to Clients › Edit.
-
Select one of the newly added clients.
-
In the Client Networking group, set the port to
9101. -
Click Apply to save changes.
-
Click Activate configuration so the changes take effect.
This client will use the 32-bit version of the backup agent to pair with appliance.
The other one will use the 64-bit version of the backup agent to pair with appliance using the default port
9102. -
-
Set up the 32-bit version of the backup agent:
-
Install and run the 32-bit version of the backup agent on the client with port
9102.You can find the configuration utility (
RVXConfig.exe) for the 32-bit version of the backup agent inC:\Program Files (x86)\RVX-Backup. -
On the Appliance tab, select Manually Assign Appliance Information, enter the port
9101, and then click Apply.
-
-
In the appliance Management Console:
-
Go to Clients › Edit.
-
Select the client where you installed the 32-bit backup agent.
-
In the General group, click Push Client Settings.
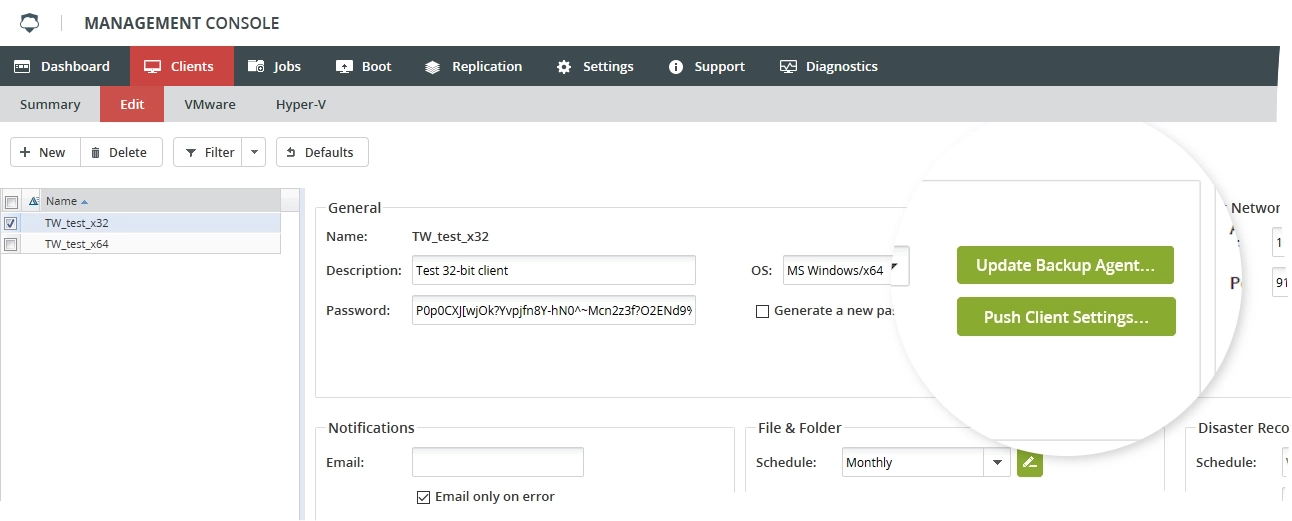
It takes a few minutes for the backup agent and appliance to connect.
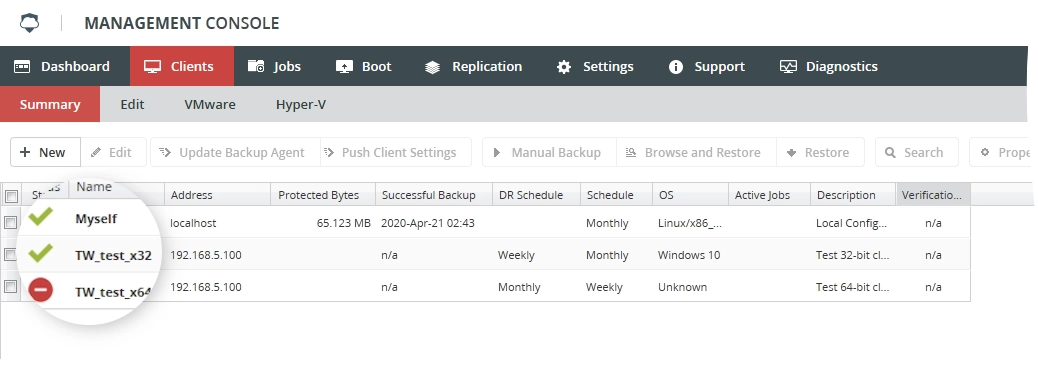
You can verify that the client is paired with appliance using the 32-bit version of the backup agent in the appliance Management Console › Clients › Summary.
-
-
Set up the 64-bit version of the backup agent:
-
Install the 64-bit version of the backup agent on another newly added client.
-
In the appliance Management Console, go to Clients › Edit.
-
Select the client where you installed the 64-bit backup agent.
-
In the General group, click Push Client Settings.

It takes a few minutes for the backup agent and appliance to connect.
You can verify that the client is paired with appliance using both the 32-bit and 64-bit versions of the backup agent in the appliance Management Console (Clients › Summary.)
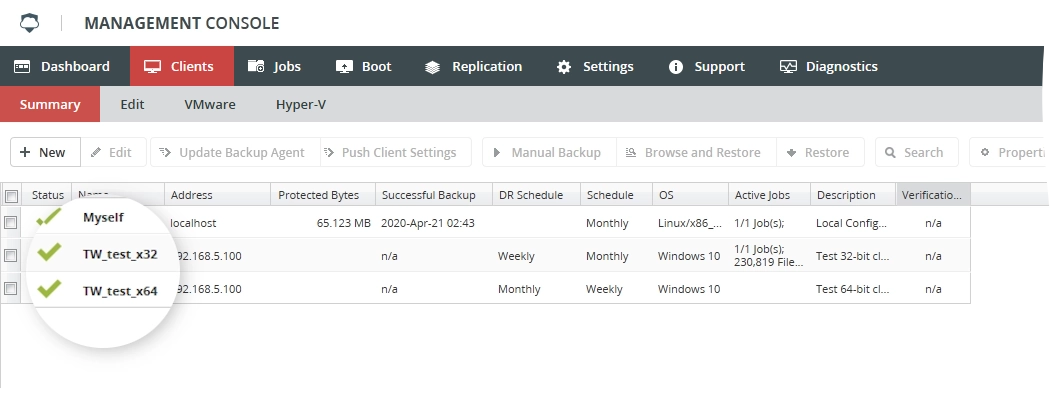
-