
To be able to back up a Hyper-V virtual machine (VM), the VM must be registered with Backup & Disaster Recovery appliance.
Registering a VM will result in a client being created for it. Once created, you can edit the clients to set options governing the VM backup and restore attributes such as deduplication, archiving, job recycling, and other.
Automatically
Automatic registration lets appliance automatically detect and register all VMs currently available via a Hyper-V connection and all VMs that will be available via the connection in future.
You can turn on automatic registration of the VMs when adding a Hyper-V connection to appliance or when editing properties of a Hyper-V connection added previously.
Note that if you select this option, and then unregister a VM manually later, the VM will be excluded from automatic registration in the future.
Manually
To register a VM manually:
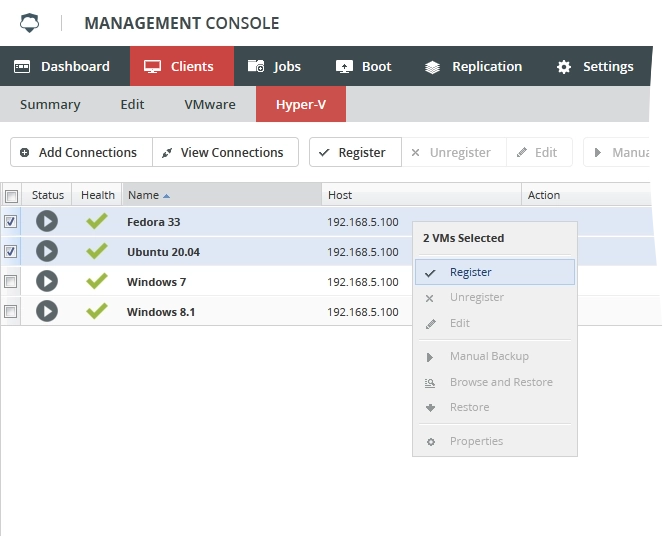
In the appliance Management Console, go to Clients › Hyper-V.
Select a non-registered VM on the list.
Click Register on the actions toolbar, or right-click the selected VM, and then click Register in the context menu.
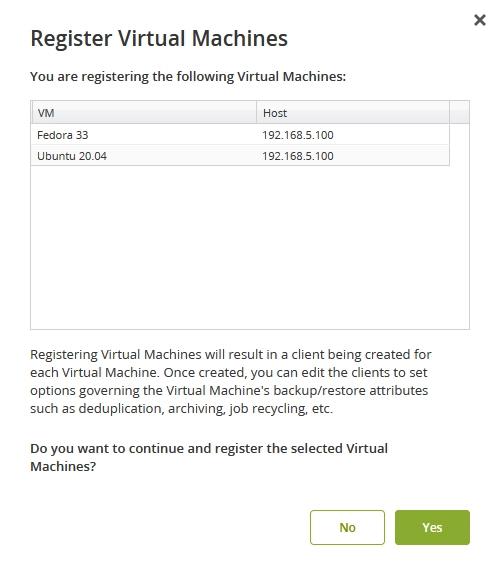
The Register Virtual Machines dialog opens.
In the open dialog, click Yes to register the VM, and wait for the process to complete.
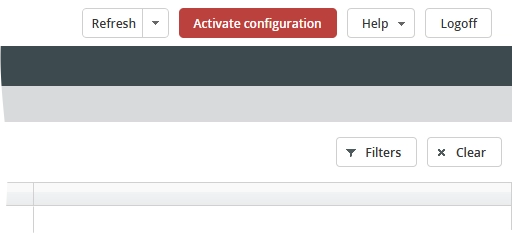
Click Activate configuration to apply changes.
Appliance registers the VM, and creates a client for it. Go to Clients › Hyper-V to view the newly created client, and to edit client configuration settings if necessary.