View and manage backups
To view and manage backups of Exchange Online user accounts in your Microsoft 365 environment within Infrascale Cloud Application Backup (CAB):
In the CAB Management Portal, click Homepage in the sidebar menu.
The list of backup tasks opens.
Click the Microsoft Exchange backup task.
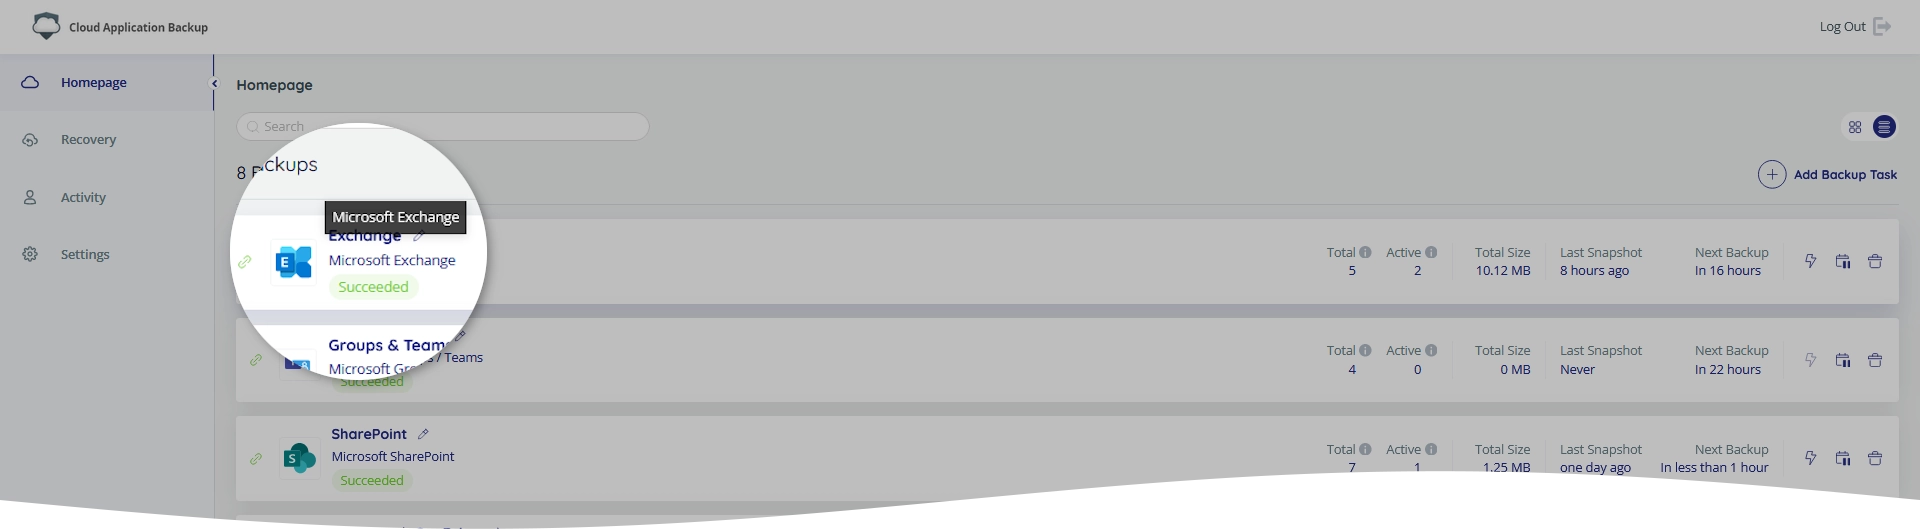
The backup task page opens.
The backup task page allows configuring backup settings, and managing backups of individual Exchange Online user accounts.
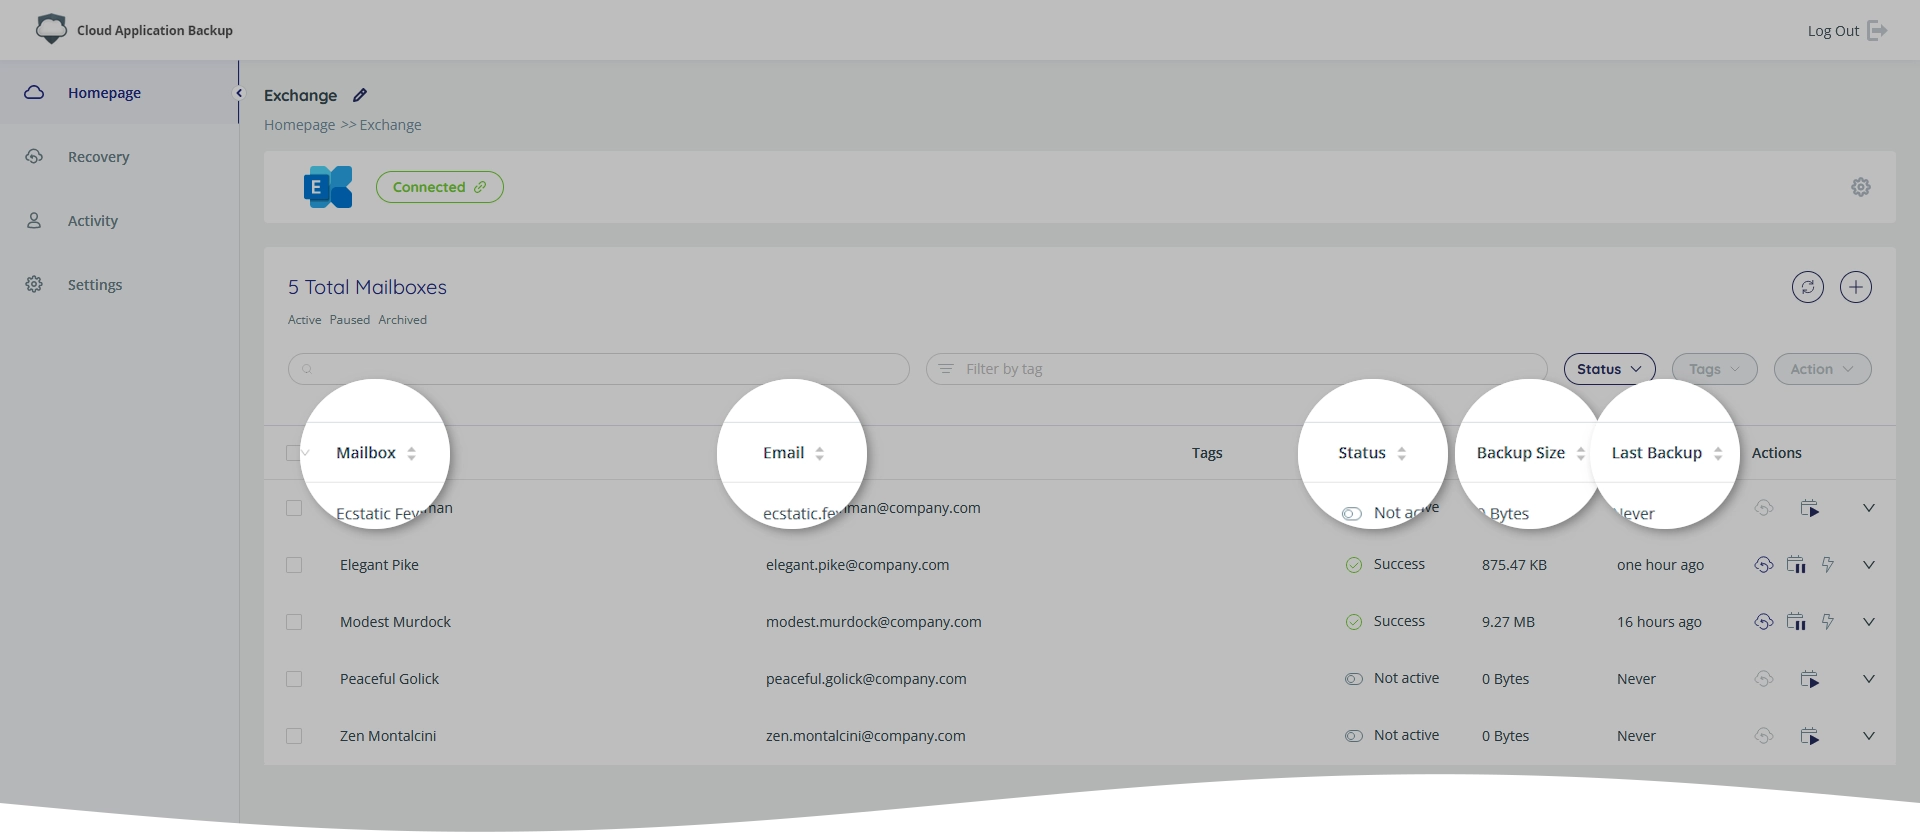
User account and backup details
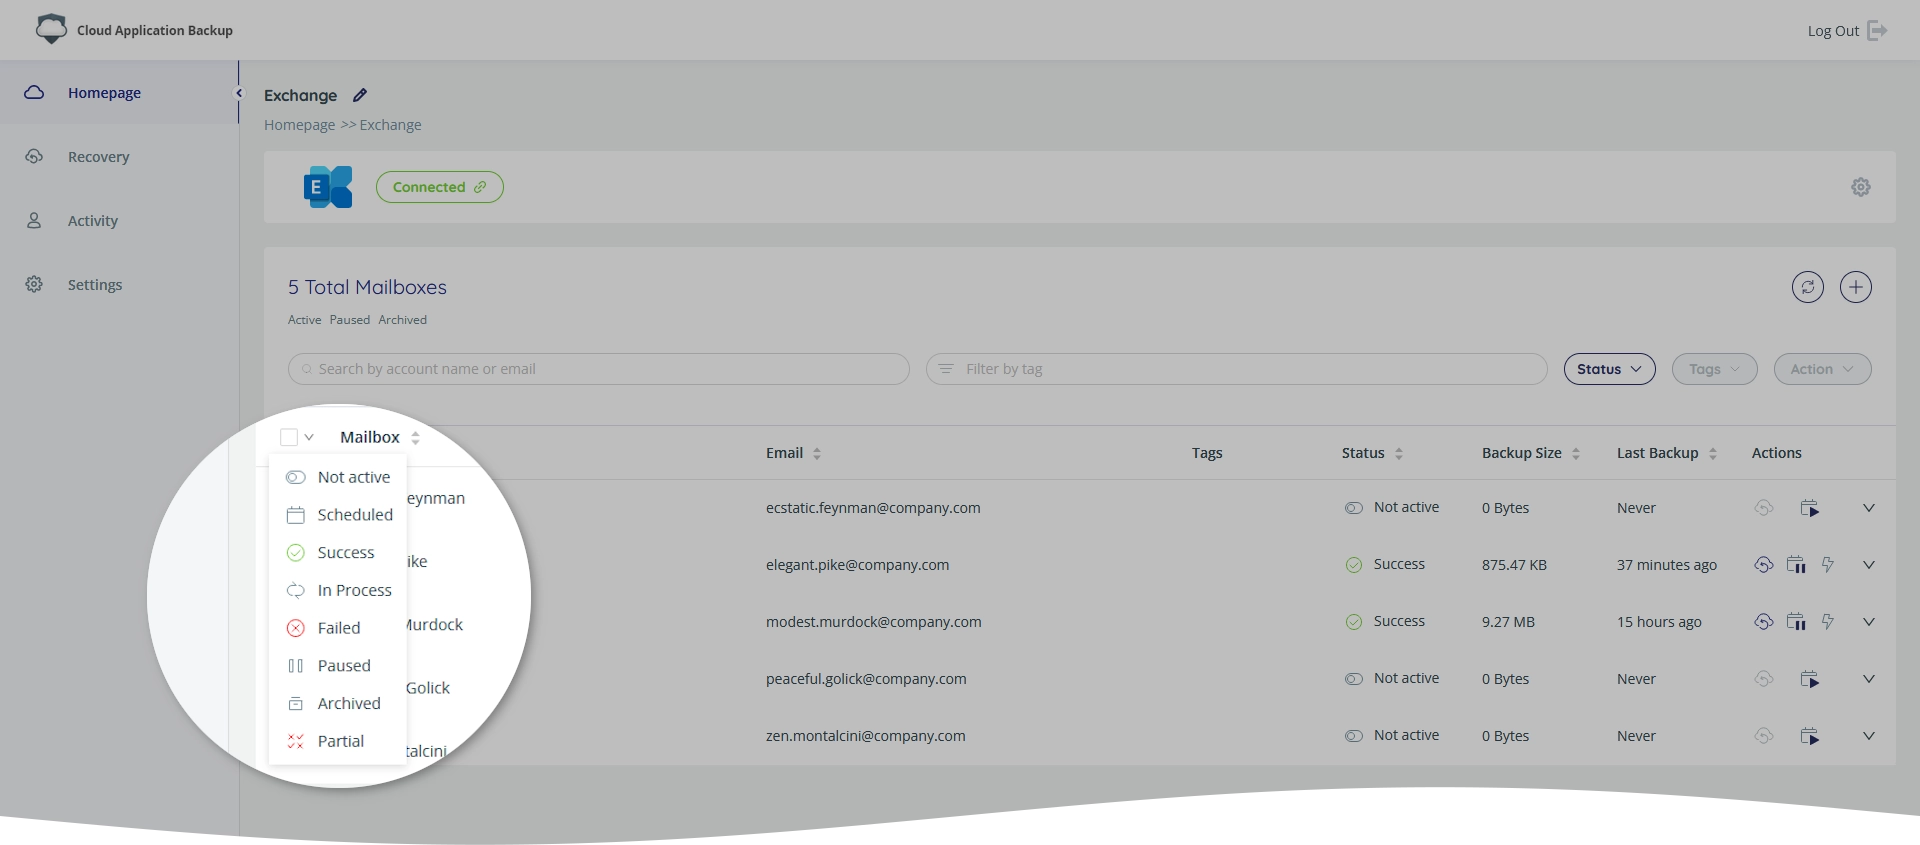
The backup task page shows all Exchange Online user accounts available for managing in CAB by your Microsoft 365 admin account in the table format with the following details:
| Details | Description |
|---|---|
| Mailbox | Name of the user account |
| Email address associated with the user account | |
| Tags | Tags associated with the user account |
| Status | Status of the user account backup. See Backup status for details. |
| Backup Size | Size of the backup data |
| Last Backup | Time from the latest completed backup |
| Actions | Set of quick actions you can take in respect to the user account backup. See Quick actions for details. |
You can sort user accounts in the backup task by these details.
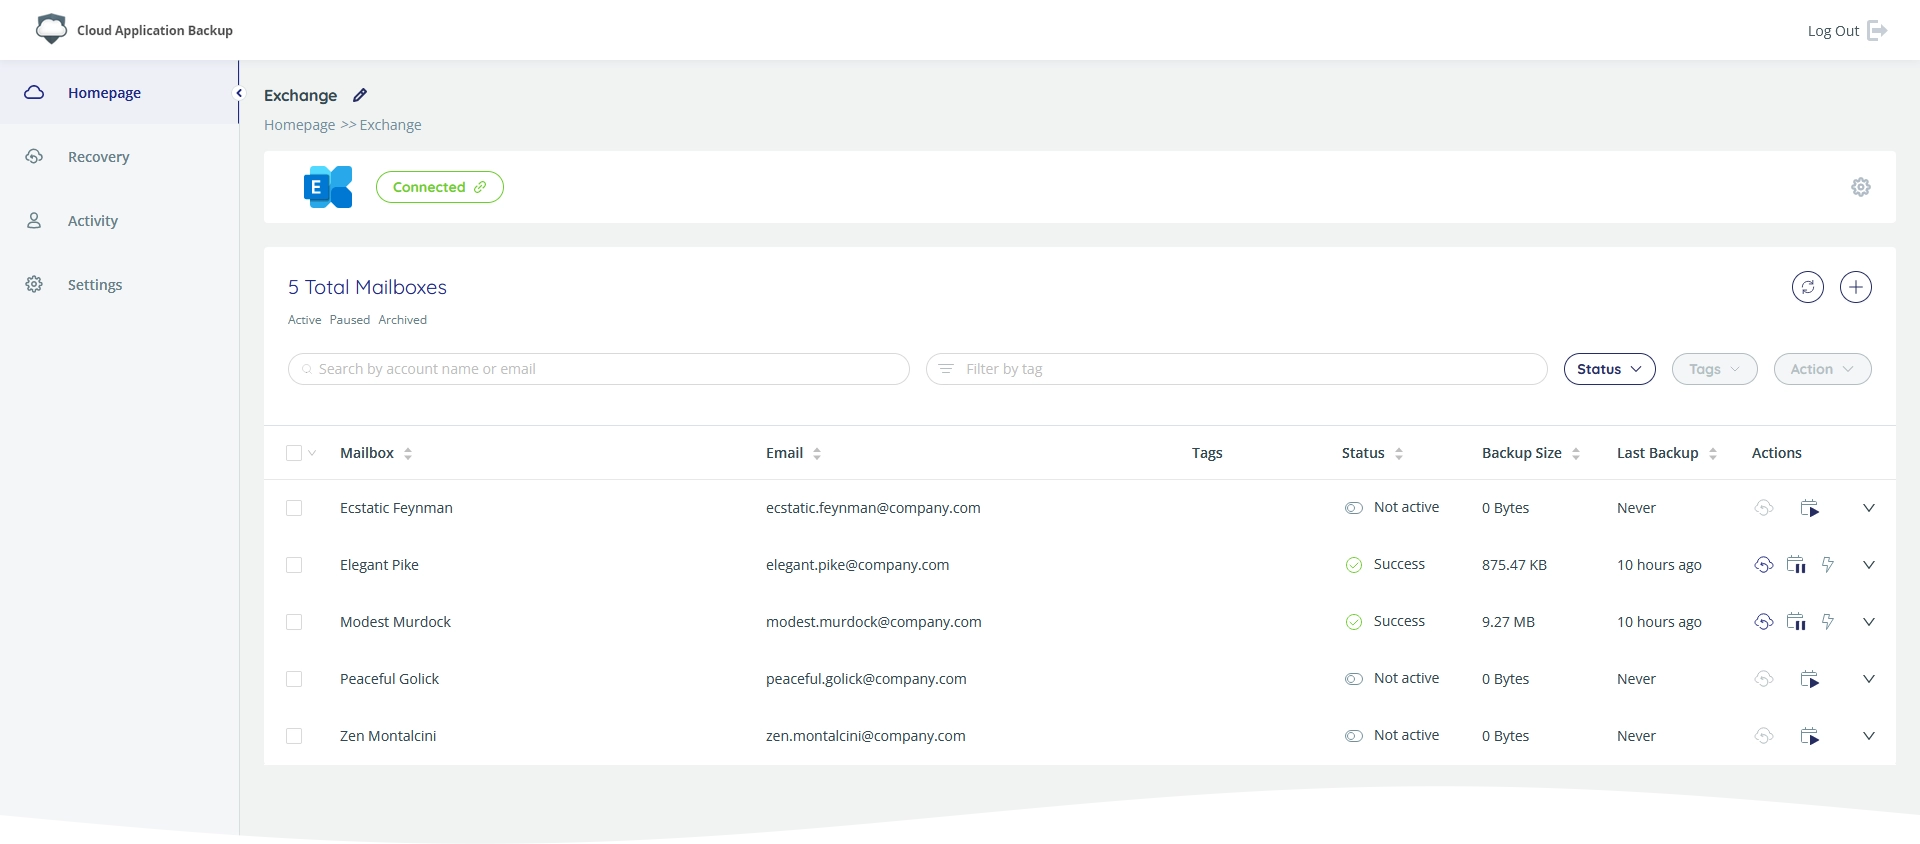
Backup status
User account backups can have one of the following statuses shown in the Status column:
| Status | Icon | Description |
|---|---|---|
| Not Active | Backup is not activated for the user account | |
| Scheduled | Backup for the user account was activated, but the initial backup was not performed yet | |
| Success | Last backup of the user account completed successfully | |
| In Process | Backup of the user account is currently in progress | |
| Failed | Last backup of the user account failed | |
| Paused | Backup of the user account is paused | |
| Archived | Backup is suspended since user account mailbox was removed from Exchange Online. Backup data is stored in our storage until you delete user account backup. | |
| Partial | CAB failed to back up one of the following types of user account data: emails, tasks, calendar, contacts, or notes |
Backup statistics
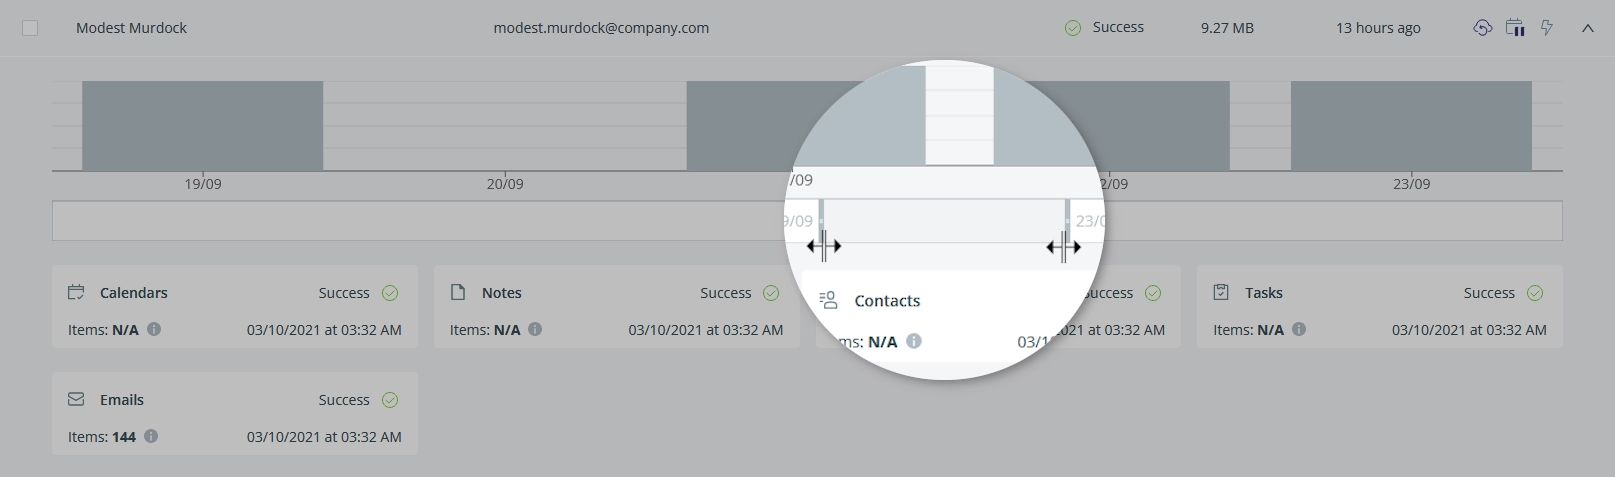
To view backup statistics for a certain user account, click More (![]() ) on the right of the user account. This will expand and show the backup timeline and the summary tiles.
) on the right of the user account. This will expand and show the backup timeline and the summary tiles.
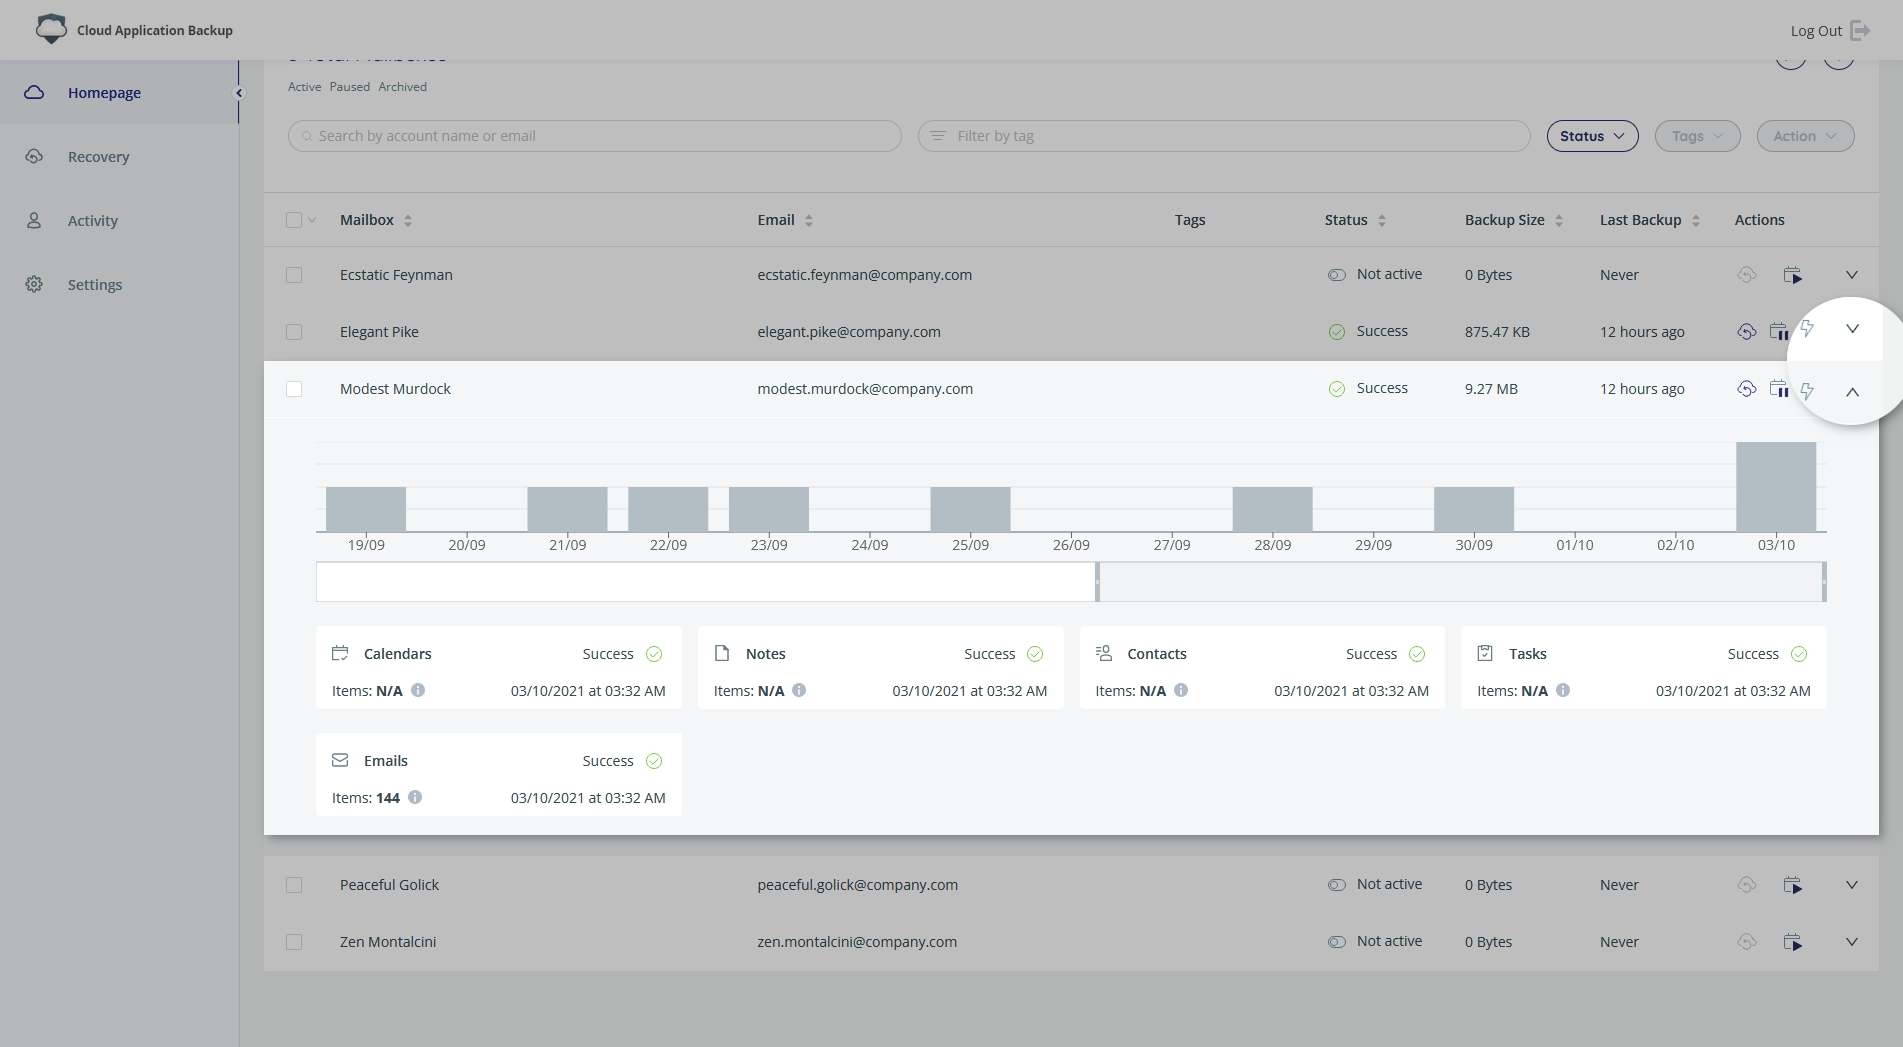
The timeline shows the number of items backed up each day. To view details, hover over the respective column. The numbers include all new and changed items, so it may be greater than the total number of items included in backup (shown in the summary tiles).
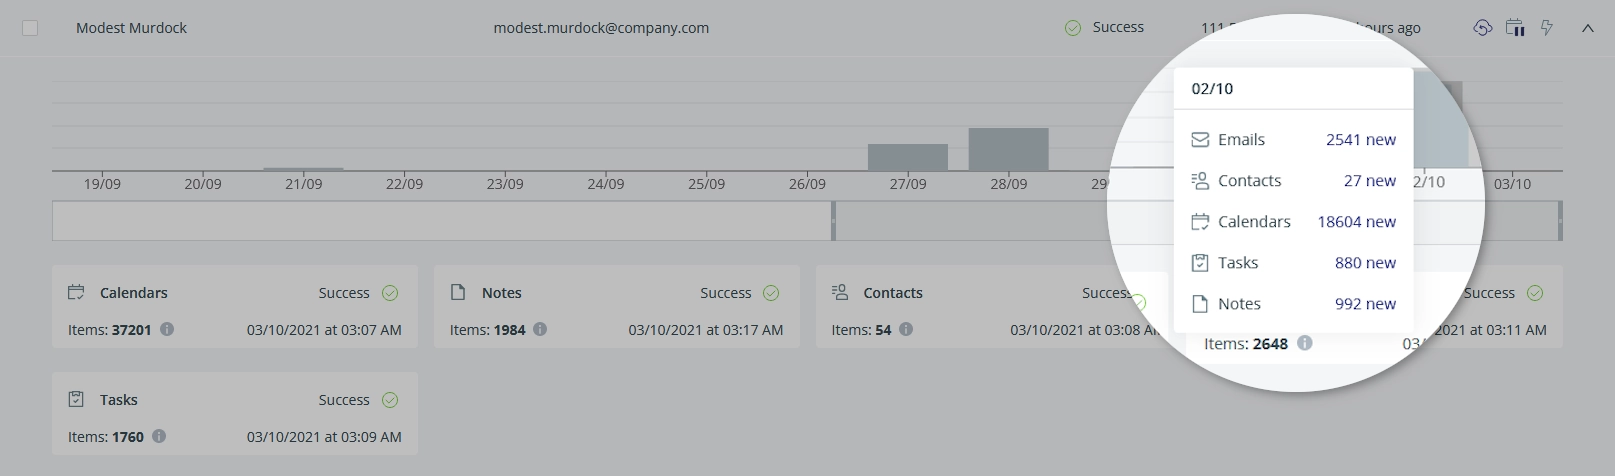
By default, the timeline shows information for the last two weeks. To adjust this range, use the slider below the timeline. The maximum range is 30 days.
The summary tiles below the timeline show information about the backup for each type of data (emails, tasks, calendar, notes, and contacts): number of items included in backup, date and result status of the last backup.
Actions on user accounts
To activate, start, pause, cancel, or delete user account backups, use quick actions or batch actions.
Quick actions
To instantly activate, start, pause, or cancel backup for a specific user account, use quick actions available next to the account.
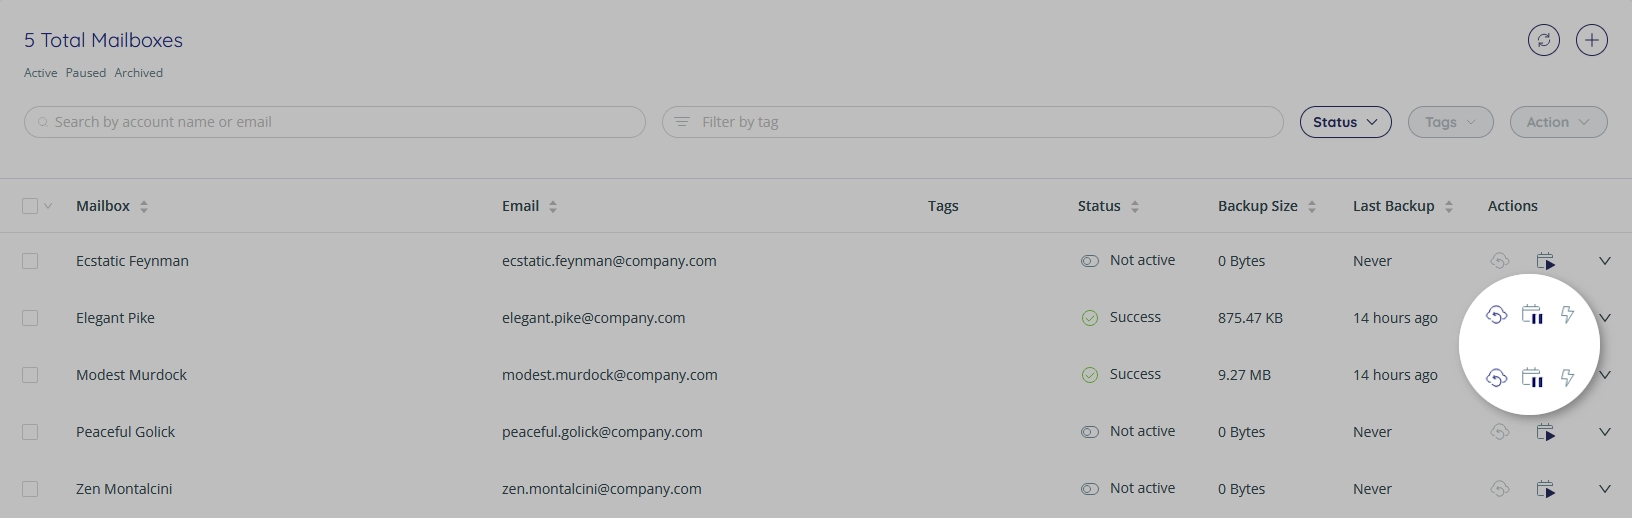
The following quick actions are available for the user account backups:
| Action | Icon | Description |
|---|---|---|
| Recovery | Start data recovery | |
| Activate | Activate backup | |
| Pause | Pause backup | |
| Backup Now | Start backup immediately | |
| Cancel | Stop backup in progress |
Batch actions
Besides quick actions, you can also take batch actions on several user accounts at once. For this:
Select checkbox on the left of one or more user accounts in the table.
To select all user accounts, select checkbox near the Mailbox column header.
If you want to select user accounts by their backup status, click the down arrow next to the Mailbox column header, and then select one of the statuses.
Click Actions on the right, and then select the desired action from the drop-down list.
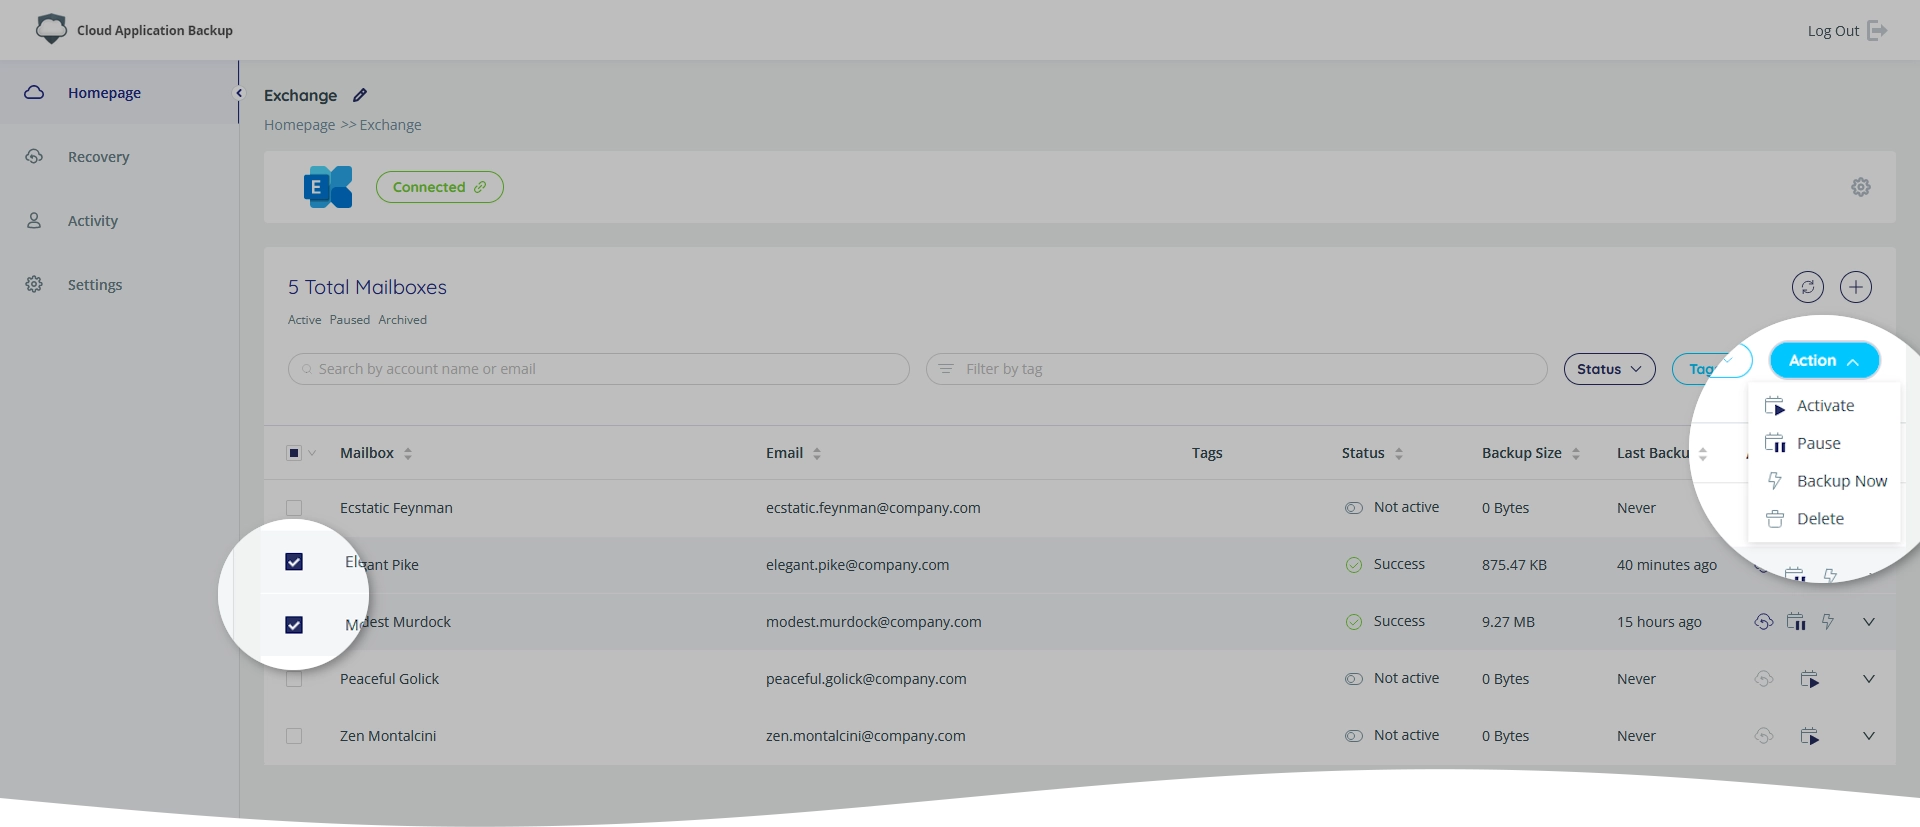
The following batch actions are available:
| Action | Icon | Description |
|---|---|---|
| Activate | Activate backup | |
| Pause | Pause backup | |
| Backup Now | Start backup immediately | |
| Delete | Remove backup and delete all backup data |
Add user accounts for backup
If you did not select to automatically detect new user accounts in your Exchange Online environment, you have to manually add user accounts for backup. For this:
Click Add (
 ) in the upper-right corner of the Accounts section.
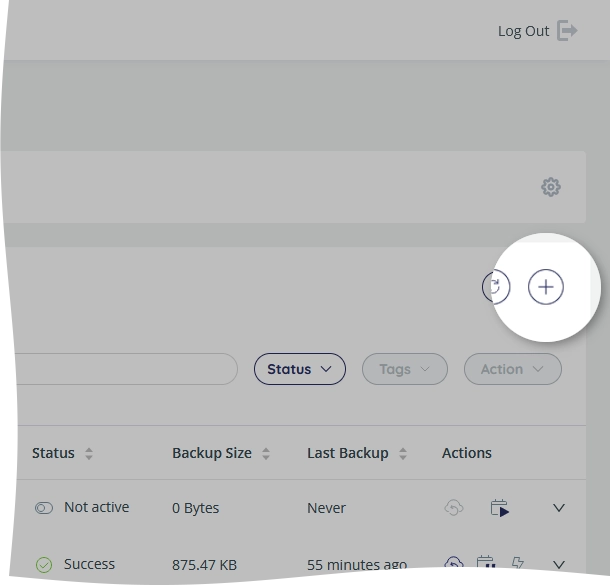
The Add Account dialog opens.
In the Account box, enter email address of an Exchange Online user account you want to add for backup, and then click Save.

CAB checks if the email address is valid and the user account is present in your Exchange Online environment. If so, the system adds the user account for backup. Otherwise, it shows an error message.
After the user account shows in the table, activate its backup.
Activate user account backups
If you did not select to automatically activate backup for user accounts in your Exchange Online environment, you have to manually activate backup for individual accounts using quick or batch actions, or using bulk activation.
Using quick or batch actions
To activate backup for individual user accounts, use quick actions.
To activate backup for multiple user accounts at once, use batch actions.
Using bulk activation
Despite the user interface provides tools to activate backup for a single account or for the multiple accounts at once, it may be inconvenient to manually select user accounts. To help you activate backup for as many users as needed in one go, CAB offers a special tool called Bulk Activation.
To start with, click Settings (![]() ) to expand the backup task settings, and then click Bulk Activation.
) to expand the backup task settings, and then click Bulk Activation.

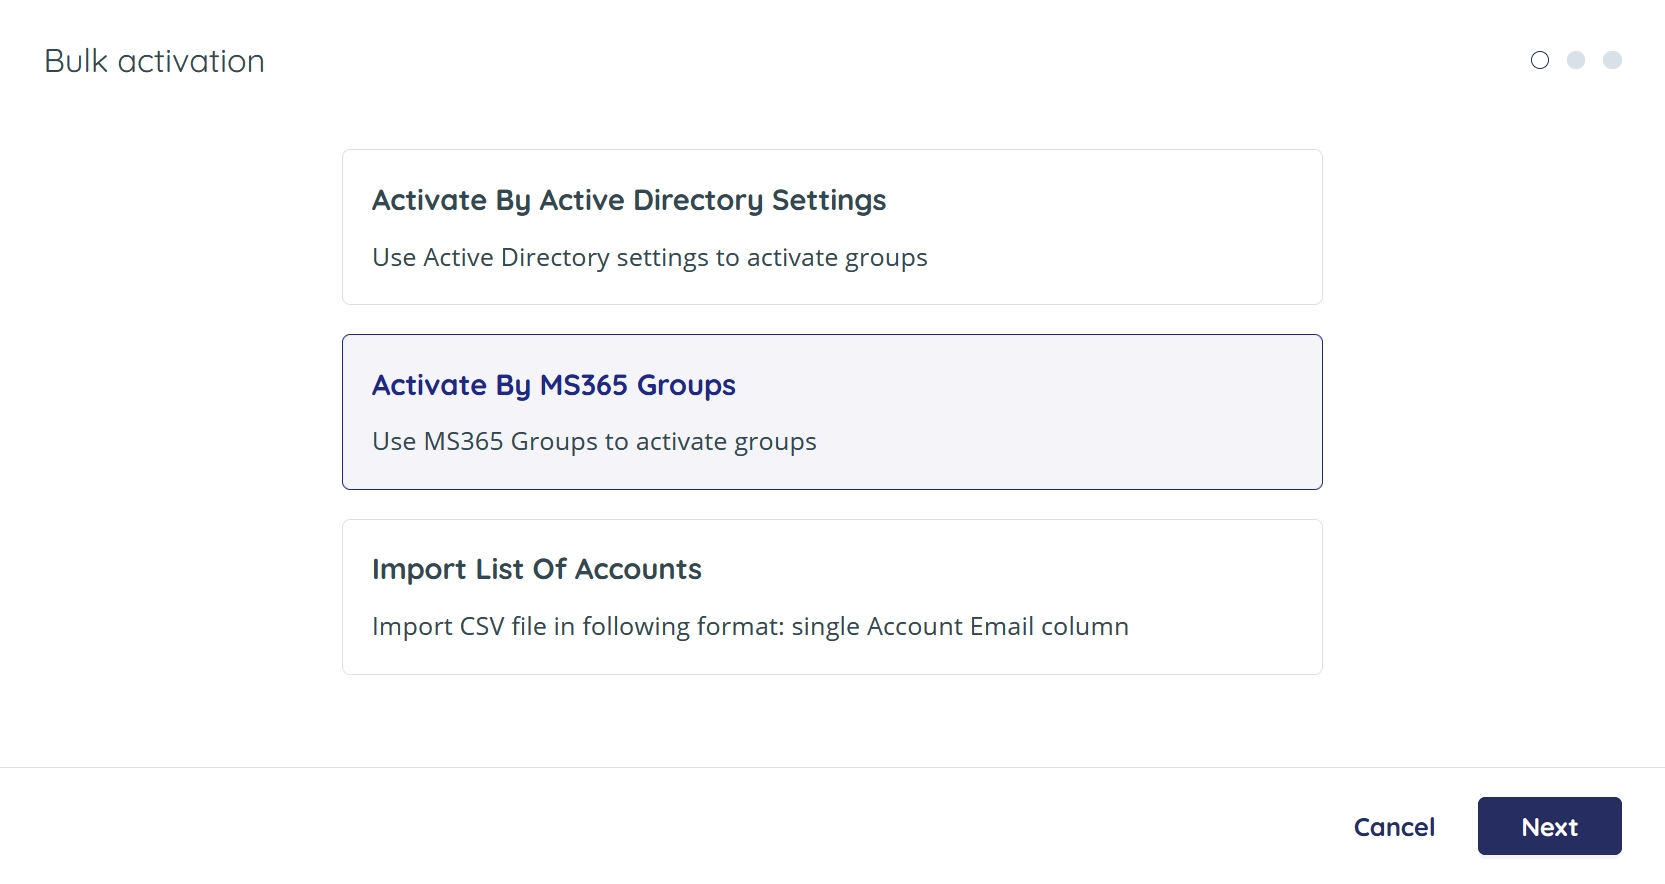
The Bulk activation wizard opens with three options available.
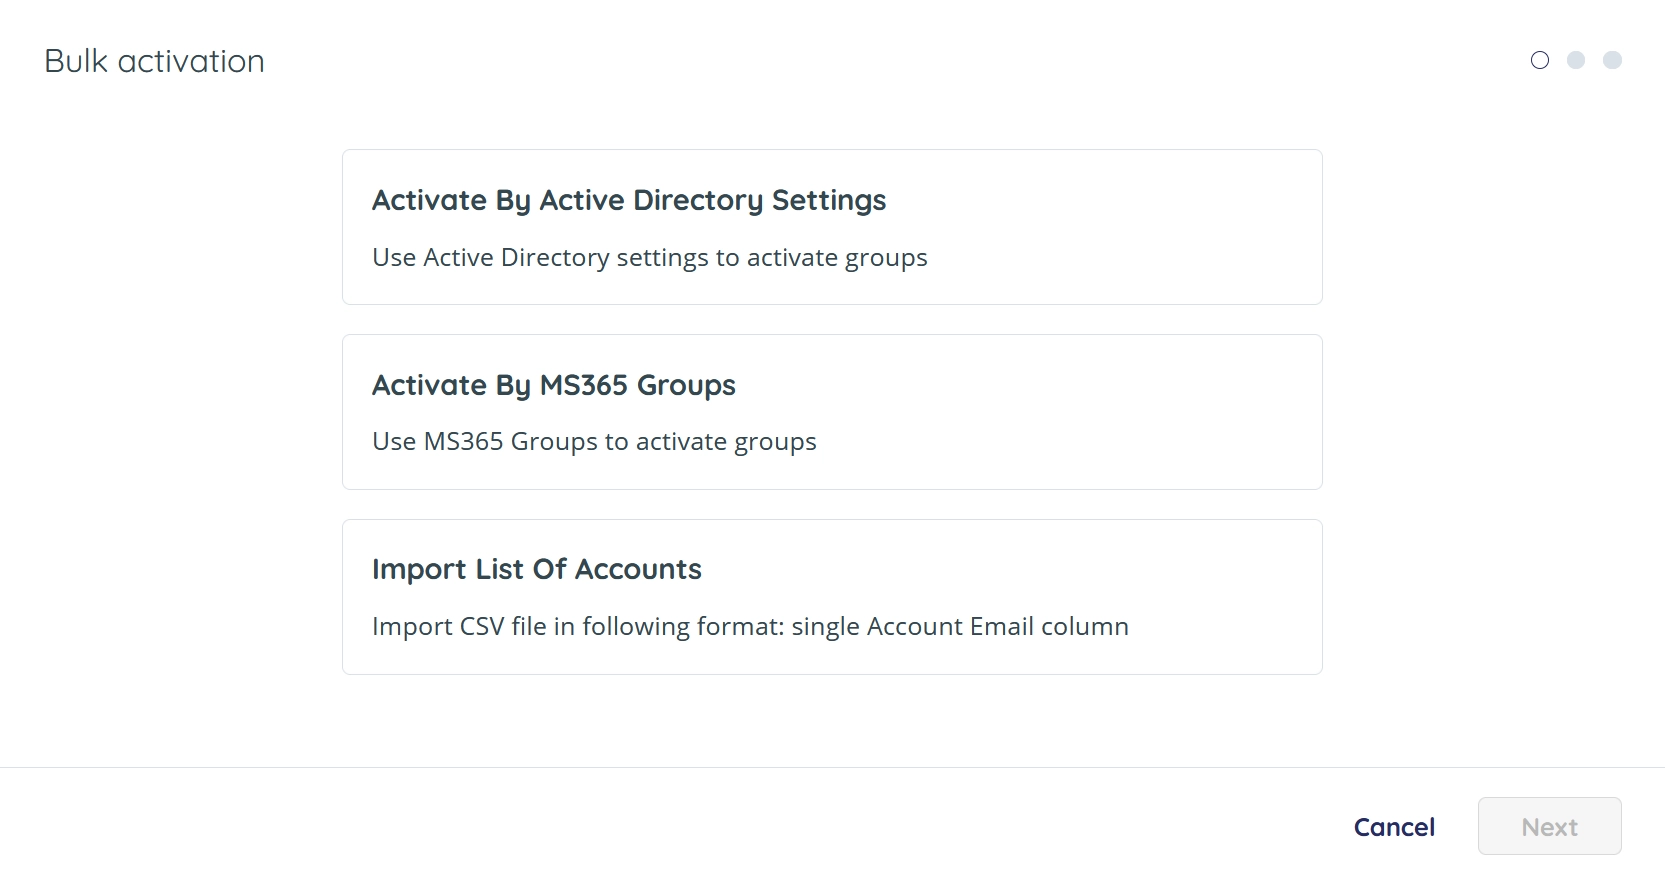
| Option | Description |
|---|---|
| Activate By Active Directory Settings | Find accounts with a specified value of an Active Directory Property and activate backup for them. Supports conditional activation. |
| Activate By MS365 Groups | Activate backup for all user accounts in the selected groups. Supports conditional activation. |
| Import List Of Accounts | Upload a list of user accounts and activate backup for them |
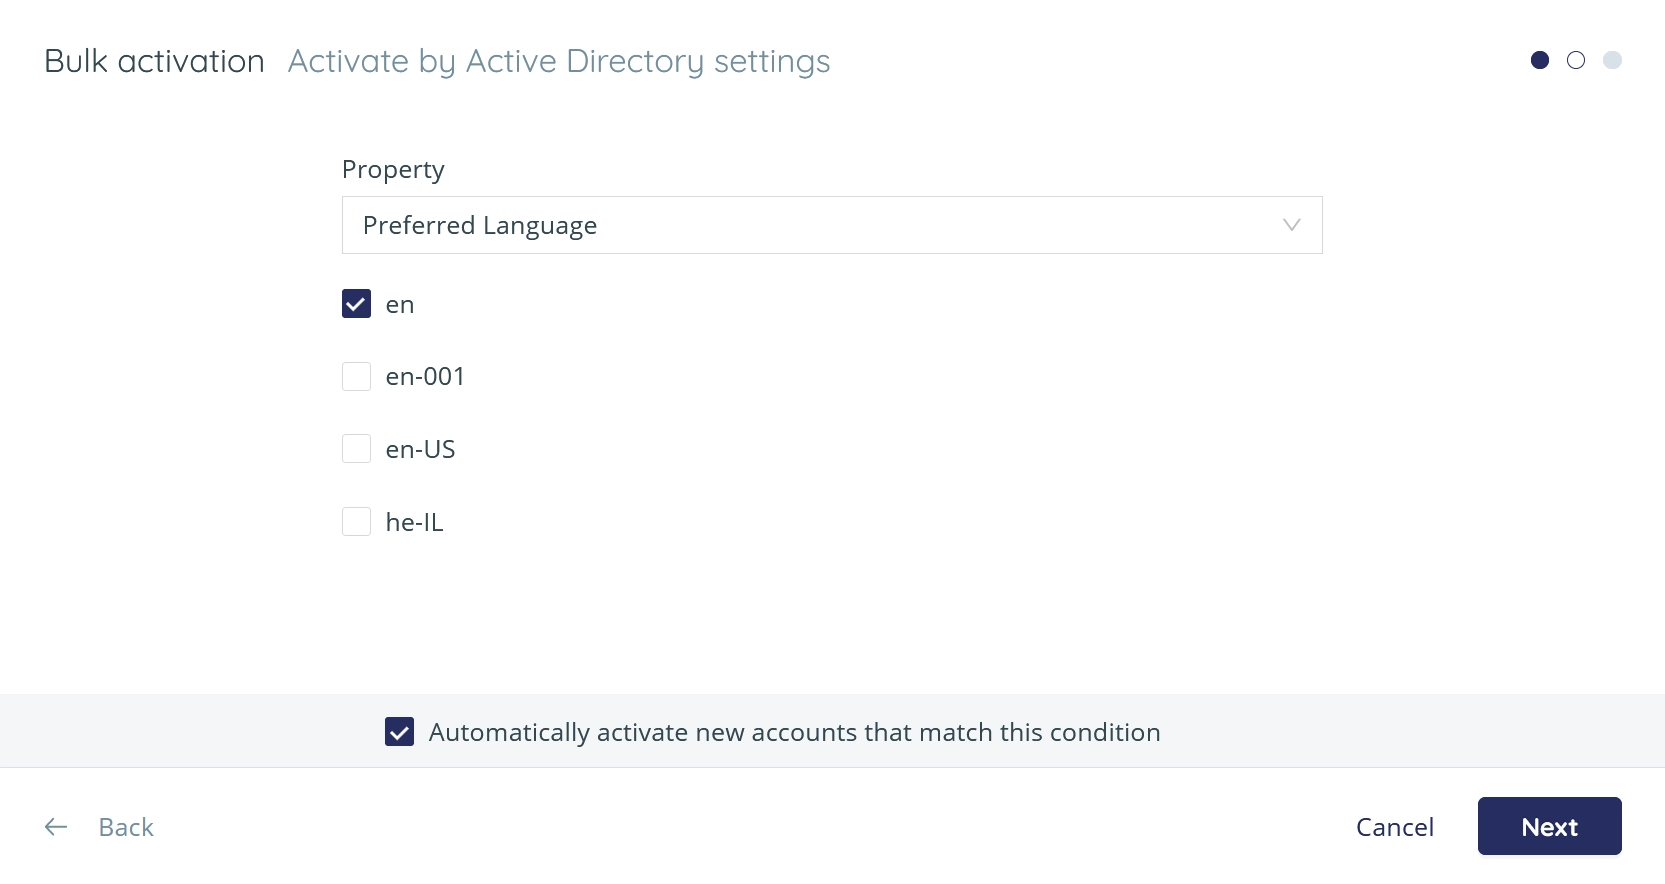
Activate by Active Directory settings
In the Bulk activation wizard:
In the first step, click Activate By Active Directory Settings, and then click Next.

In the second step:
In the Property drop-down list, select a property you want to use to filter user accounts by.
The following properties are available:
Property Description Account Enabled Required when a user is created Age Group Used for adjusting regulatory requirements compliance age rule City The city in which the user is located Company Name The company name which the user is associated Country The country or region in which the user is located Department The name for the department in which the user works Job Title The user’s job title Office Location The office location in the user’s place of business Postal Code The postal code for the user’s postal address. The postal code is specific to the user’s country or region. Preferred Language The preferred language for the user State The state or province in the user’s address User Location User location The system shows the values available for the property you selected.
Select the values you want to use to filter user accounts by.
Optionally, select Automatically activate new accounts that match this condition if you want to create a conditional activation rule based on the property and the values you selected.
This rule does not affect the existing activated user accounts.
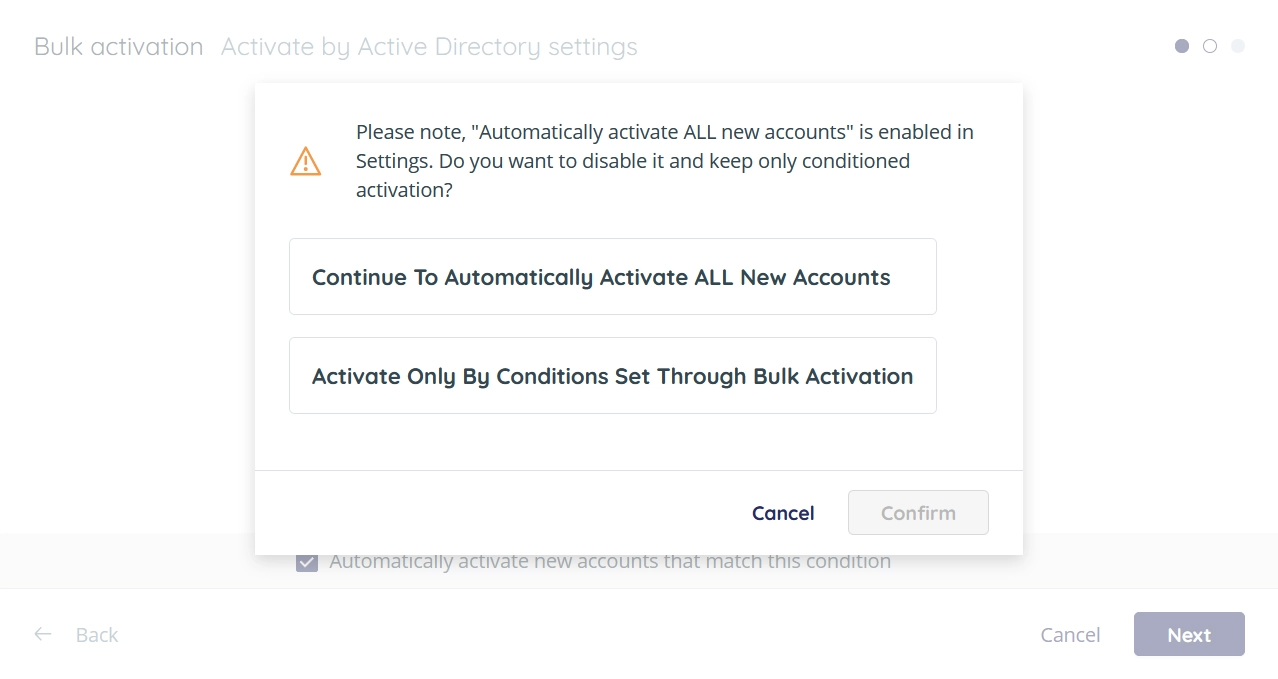
If you selected to automatically detect and activate backup for all user accounts, the system asks which option you want to continue with.

Select Continue To Automatically Activate ALL New Accounts to cancel creation of the conditional rule, and to continue activating backup for all new user accounts without exception.
Select Activate Only By Conditions Set Through Bulk Activation to create and apply the conditional rule to activate backup for new user accounts.
If you continue with conditional activation rule, it will disable implicit automatic activation of backup for all new user accounts that you selected when configuring backup settings. If you later select Activate ALL new accounts again in the Backup Settings section, it will remove any conditional rules created here.
Click Next.
The system finds all user accounts in your Active Directory that are matching the property and the values you selected.
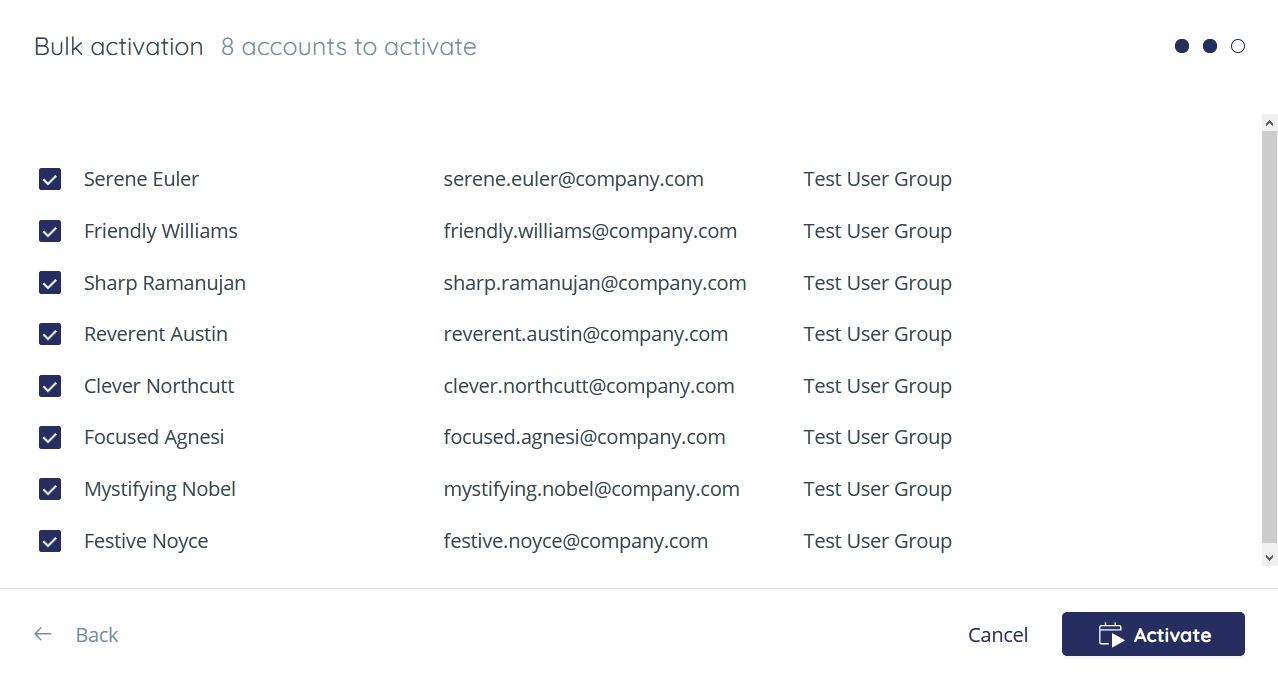
In the third step, select user accounts you want to activate backup for, and then click Activate.
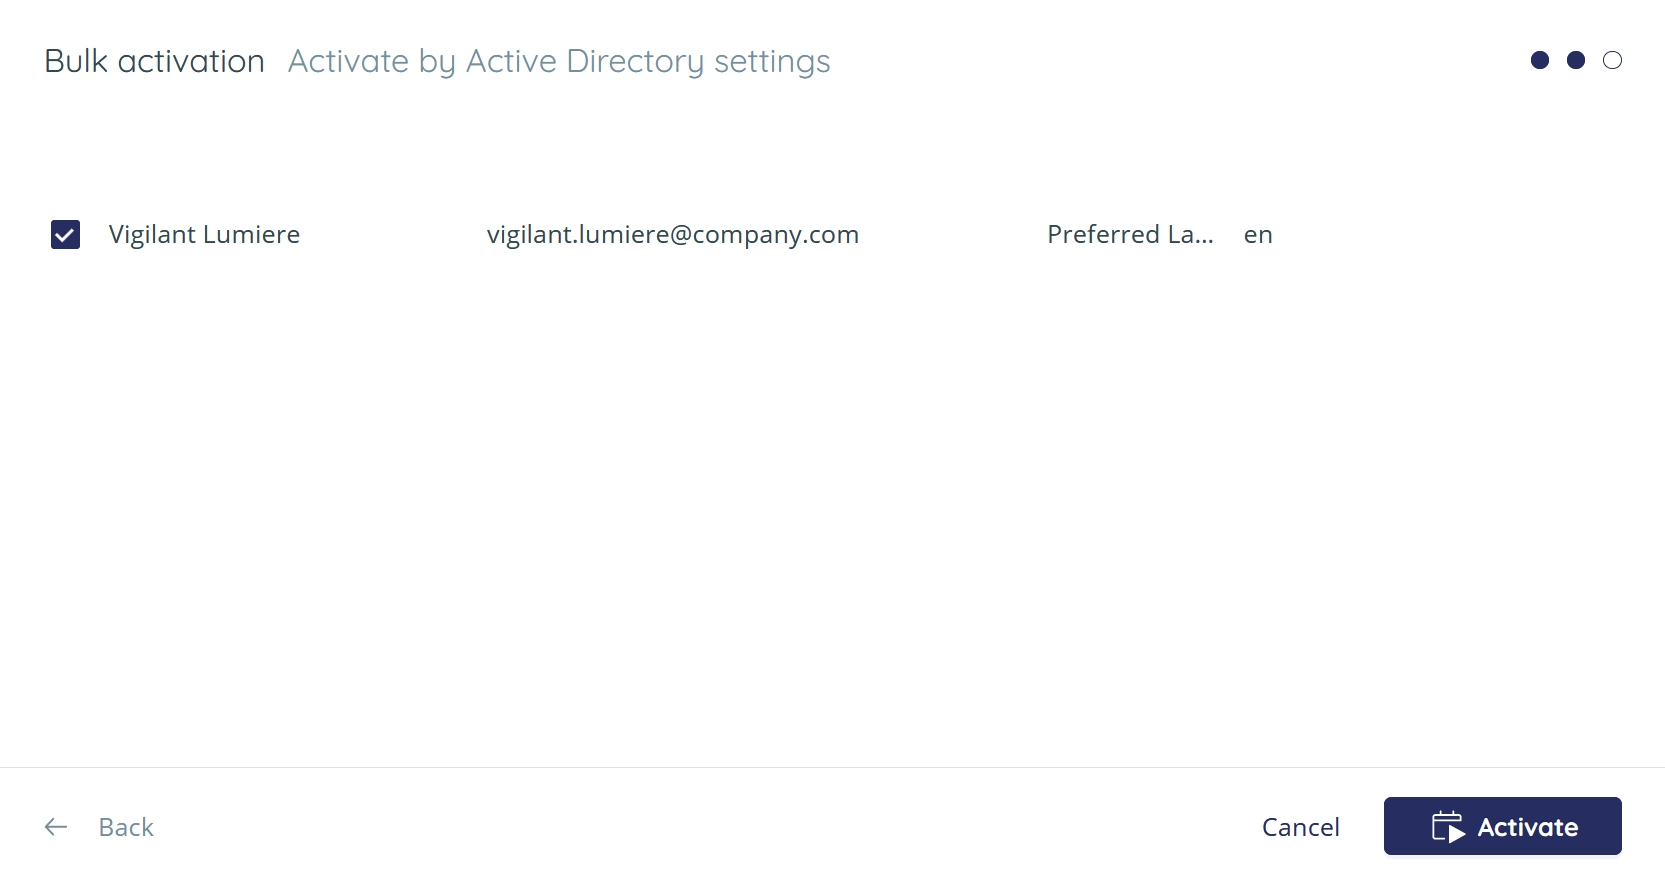
The system activates backup for the selected user accounts, and creates a conditional activation rule if you selected the respective checkbox in the second step of the wizard.
Activate by Microsoft 365 Groups
In the Bulk activation wizard:
In the first step, click Activate By MS365 Groups, and then click Next.
In the second step:
From the list of groups, select those you want the system to find user accounts in.

Optionally, select Automatically activate new accounts that match this condition if you want to create a conditional activation rule based on the property and the values you selected.
This rule does not affect the existing activated user accounts.
If you selected to automatically detect and activate backup for all user accounts, the system asks which option you want to continue with.
Select Continue To Automatically Activate ALL New Accounts to cancel creation of the conditional rule, and to continue activating backup for all new user accounts without exception.
Select Activate Only By Conditions Set Through Bulk Activation to create and apply the conditional rule to activate backup for new user accounts.
If you continue with conditional activation rule, it will disable implicit automatic activation of backup for all new user accounts that you selected when configuring backup settings. If you later select Activate ALL new accounts again in the Backup Settings section, it will remove any conditional rules created here.
Click Next.
In the third step, select user accounts you want to activate backup for, and then click Activate.
The system activates backup for the selected user accounts, and creates a conditional activation rule if you selected the respective checkbox in the second step of the wizard.
Activate by importing accounts
In the Bulk activation wizard:
In the first step, click Import List Of Accounts, and then click Next.

In the second step:
Add a CSV file with the list of email addresses of the user accounts you want to activate backup for.
The file must be properly formatted. Click Sample to download the example file.
Email
example1@subdomain.onmicrosoft.com
example2@subdomain.onmicrosoft.com
example3@subdomain.onmicrosoft.com
example4@subdomain.onmicrosoft.com
You can either drag the file to the dialog or click the gray area in the dialog to find and select the file.
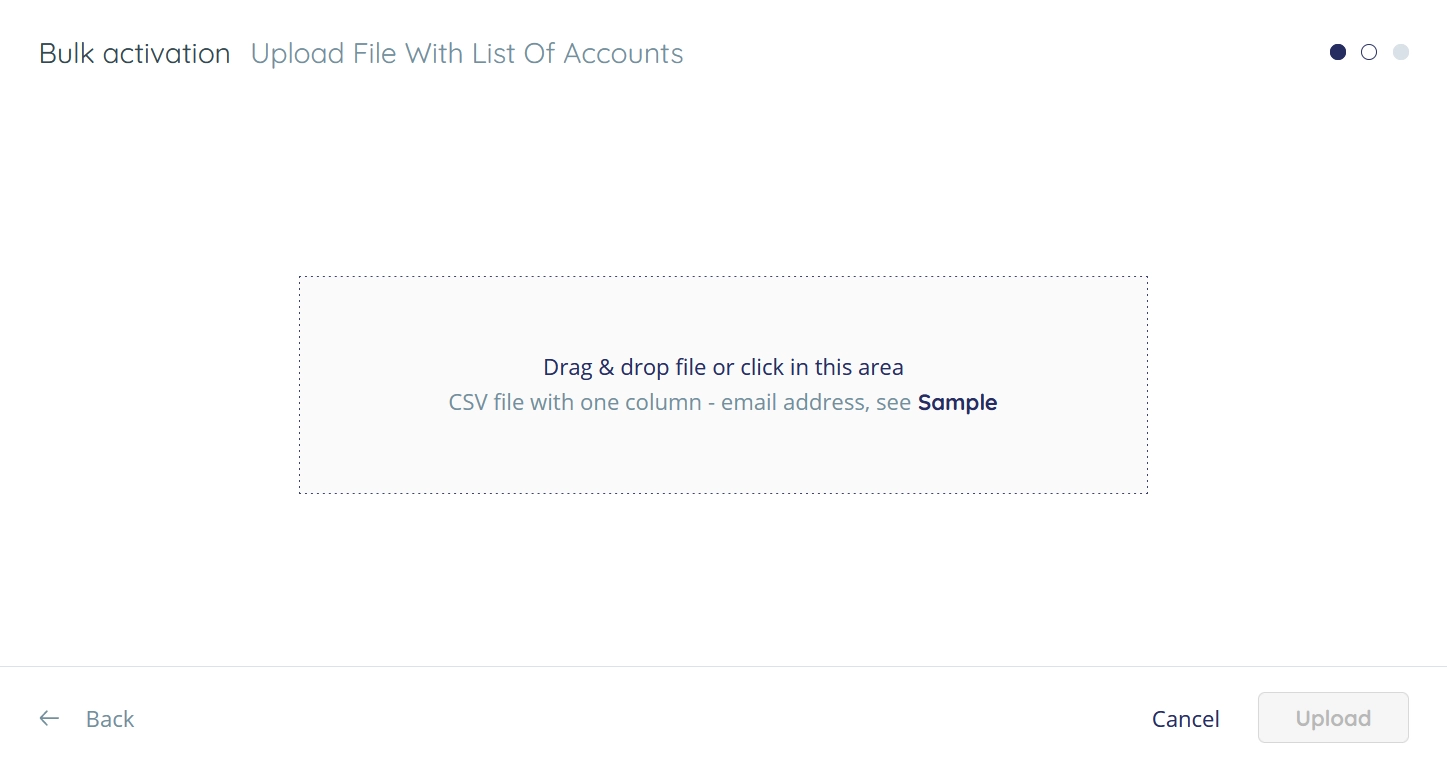
After you add the file, click Upload.

The system checks if user accounts with email addresses in the uploaded file exist in your Exchange Online environment. After that, it shows the list of user accounts you can activate the backup for.
In the third step, select user accounts you want to activate backup for, and then click Activate.
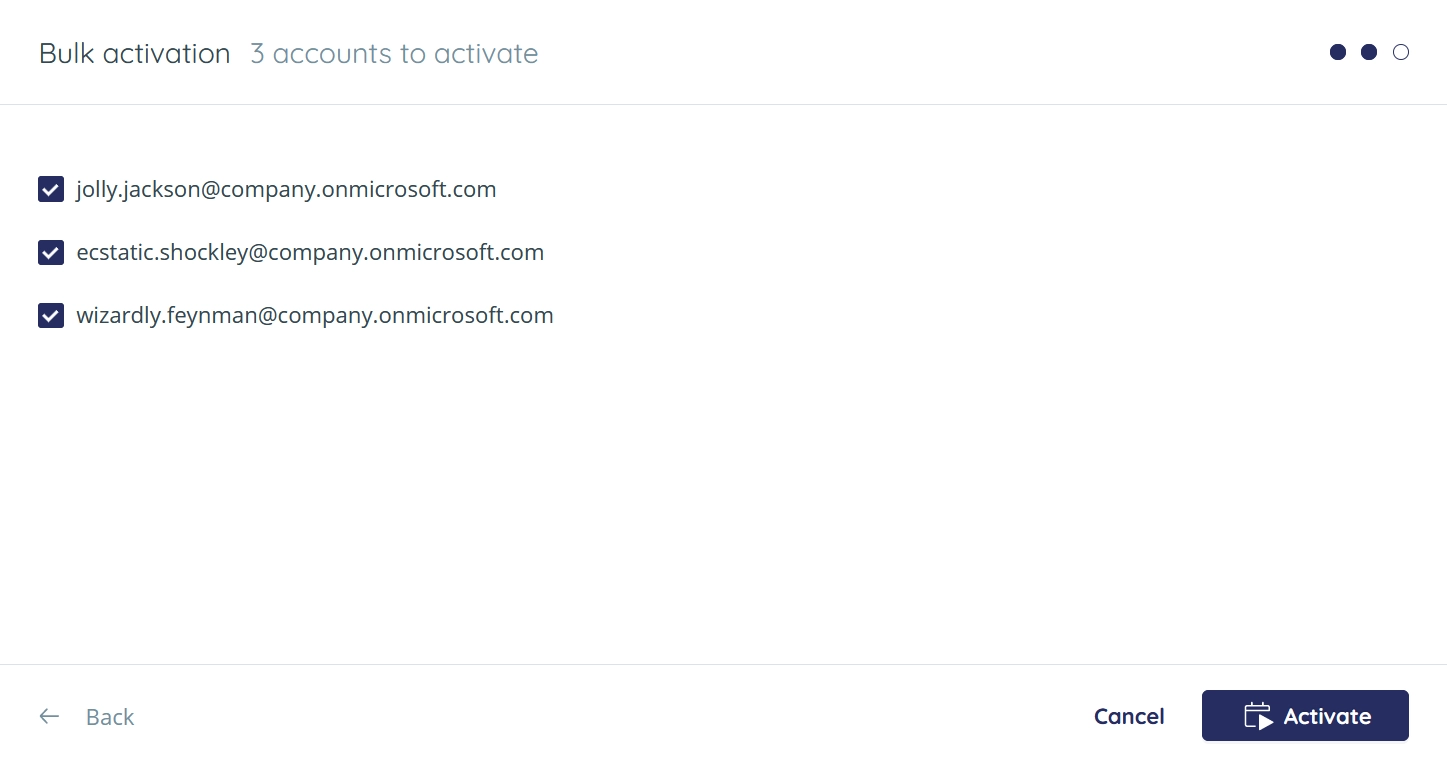
The system activates backup for the selected user accounts.
Search user accounts
You can search user accounts in the backup task by account name and email. For this, enter at least three characters in the search box on the toolbar.

Sort user accounts
You can sort user accounts in the backup task in ascending or descending order by account username, account email, backup status, backup size, or last backup date. For this, click the header of one of the relevant table columns.