To restore data backed up from Microsoft 365 SharePoint Online using Infrascale Cloud Application Backup (ICAB), follow the steps below:
Sign in to your account in the Dashboard.
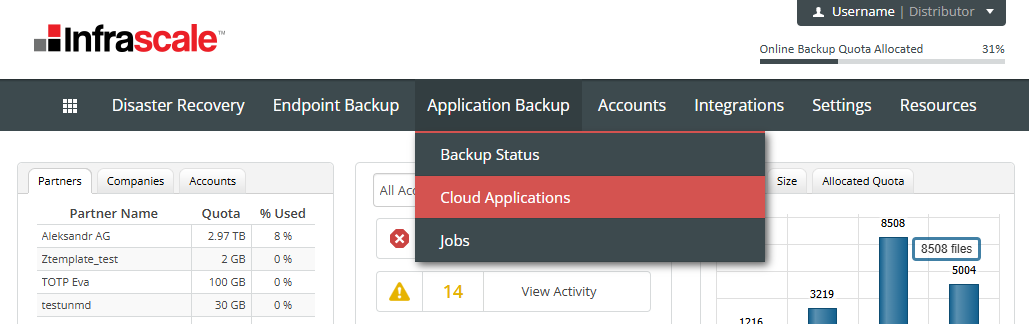
Go to Application Backup › Cloud Applications
- Click the gear icon (
 ) next to the desired backup, and select Recovery
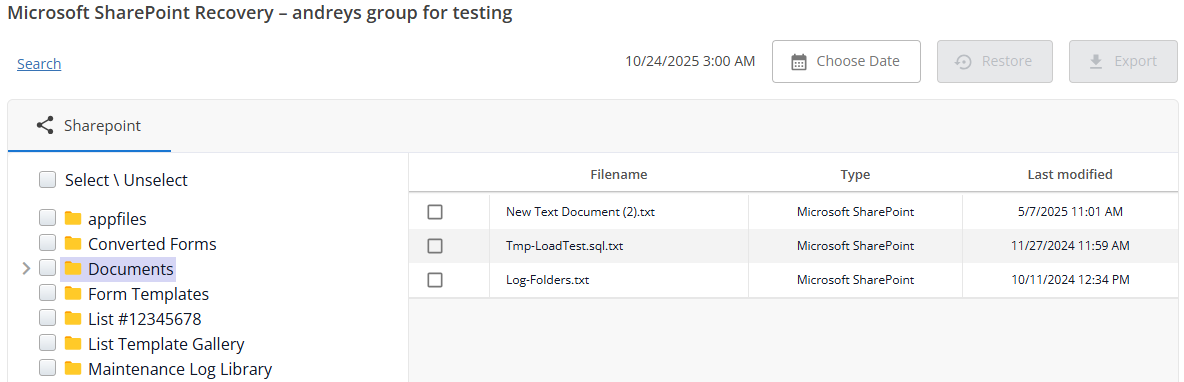
In the list of sites, locate the name for which you want to restore data, and click on it.

You can use the search bar to narrow results

- Navigate through the folder structure and select the items you wish to restore by checking the boxes next to them
Note that objects with the system property cannot be recovered. The easiest way to verify system-level paths and properties:
- Select the file/folder
- Open the Details Pane (the “i” icon)
- Scroll to the “More Details” or “Properties” section at the bottom.
- System Property: Look for the Path or Original Location. If the path includes /_catalogs/, /_cts/, or /_themes/, it is a system-protected object.
- If you want to restore data from a previous snapshot, click Choose Date in the top-right corner, and select the desired backup date.
- Each backup is represented by a green dot on the calendar.
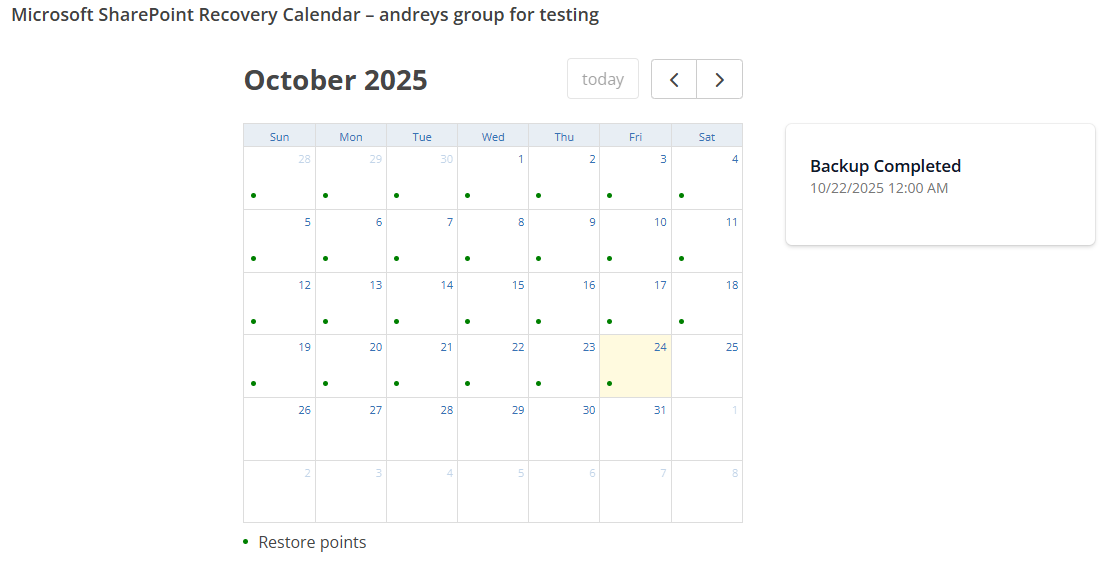
- After selecting a date, click the corresponding backup on the right.
- Each backup is represented by a green dot on the calendar.
- Alternatively, instead of browsing manually, click Search at the top of the recovery page and enter search criteria such as:
Keyword or phrase
Date range
Sender or recipient email address
Author
Path
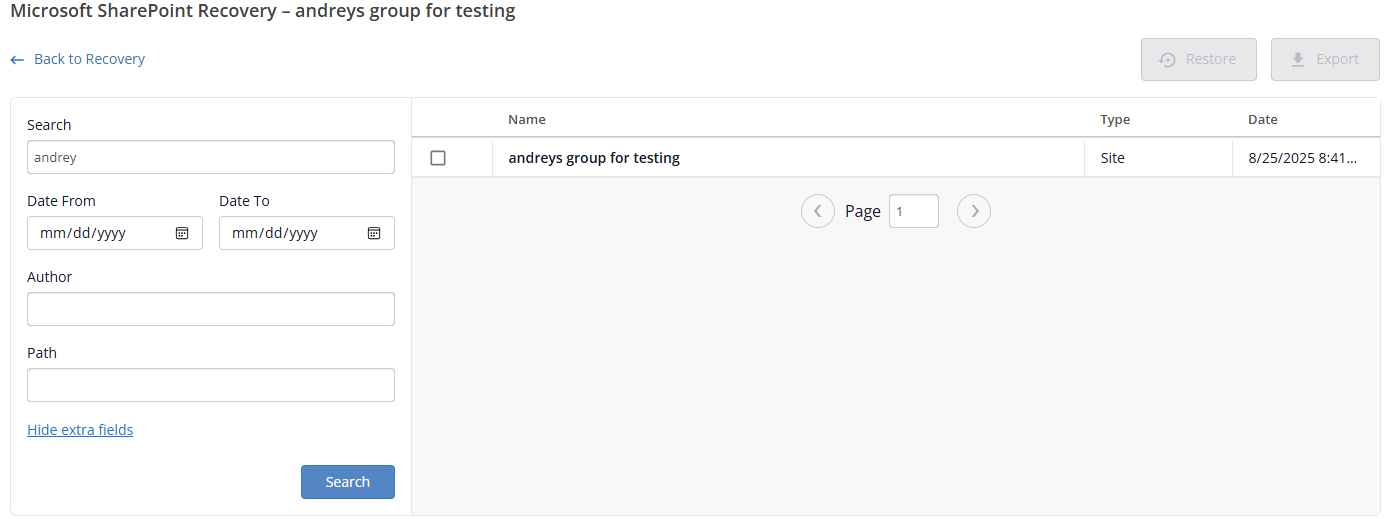
- After selecting the desired items, click Restore to recover the data to Microsoft 365 SharePoint, or click Export to download the data directly to your local computer.
- If you selected Restore in the previous step, in the Restore to field, select Another mailbox if you want to restore data to a different mailbox, and specify the target mailbox in the provided field.
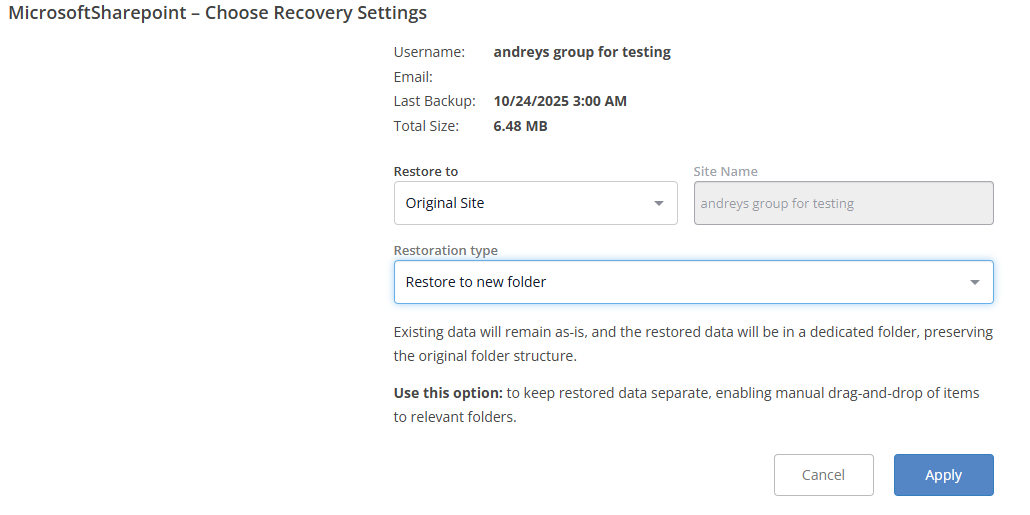
- Choose the Restoration type from the dropdown menu, then click Apply in the bottom-right corner
Restoration type Description Restore to new folder Existing data will remain as-is, and the restored data will be in a dedicated folder, preserving the original folder structure.
Use this option to keep restored data separate, enabling manual drag-and-drop of items to relevant folders.Overwrite all data in place Restored content will be merged with existing data. Deleted items and folders will be restored from the snapshot. Existing items will be overwritten with the snapshot version.
Use this option to restore or repair deleted/modified items.Restore only deletes items in place Restored content will be merged with existing data. Deleted items and folders will be restored from the snapshot. Existing items will be skipped.
Use this option to restore deleted data. - After initiating the restore, you can monitor its progress on the Cloud Application Jobs page.
- Refresh the page to update the job status.
- Once the job is complete, the end time will be displayed.

- Refresh the page to update the job status.
- If you selected Export in Step 8, use the Split by field to specify the size of the volumes into which the resulting ZIP archive will be split. Available options include 1 GB, 5 GB, 10 GB, and 20 GB. Once selected, click Apply.
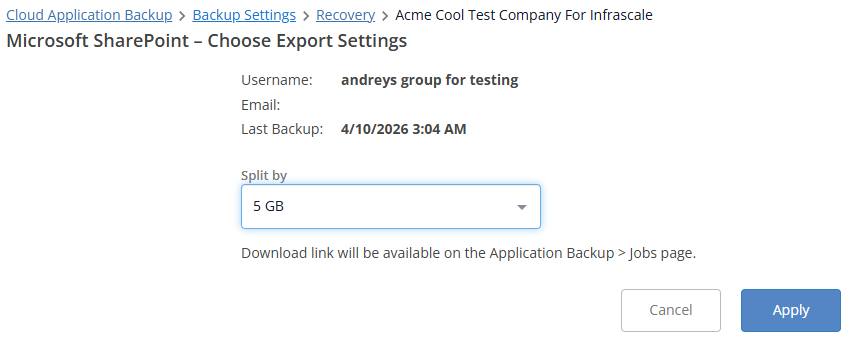
- After initiating the export, a confirmation message will appear in the upper-right corner of the page. You will then be redirected to the Cloud Application Jobs page, where you can monitor the progress of the export operation

- Once the export is complete, click the
 icon located on the right side of the corresponding job entry
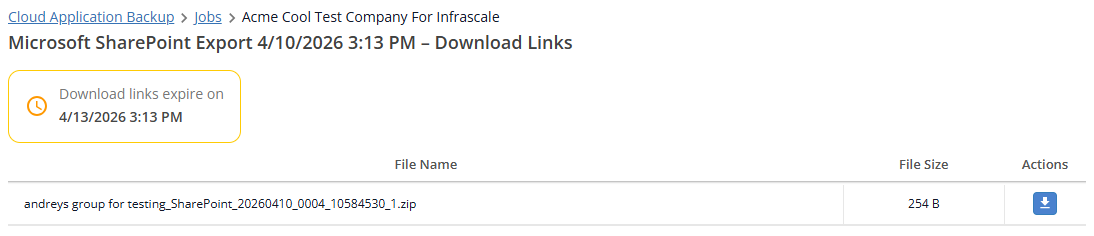
- The Download page will be displayed. Click the icon to save the data to your computer.