Provide integration credentials
First of all, you have to provide the integration credentials to connect your Infrascale Dashboard account.
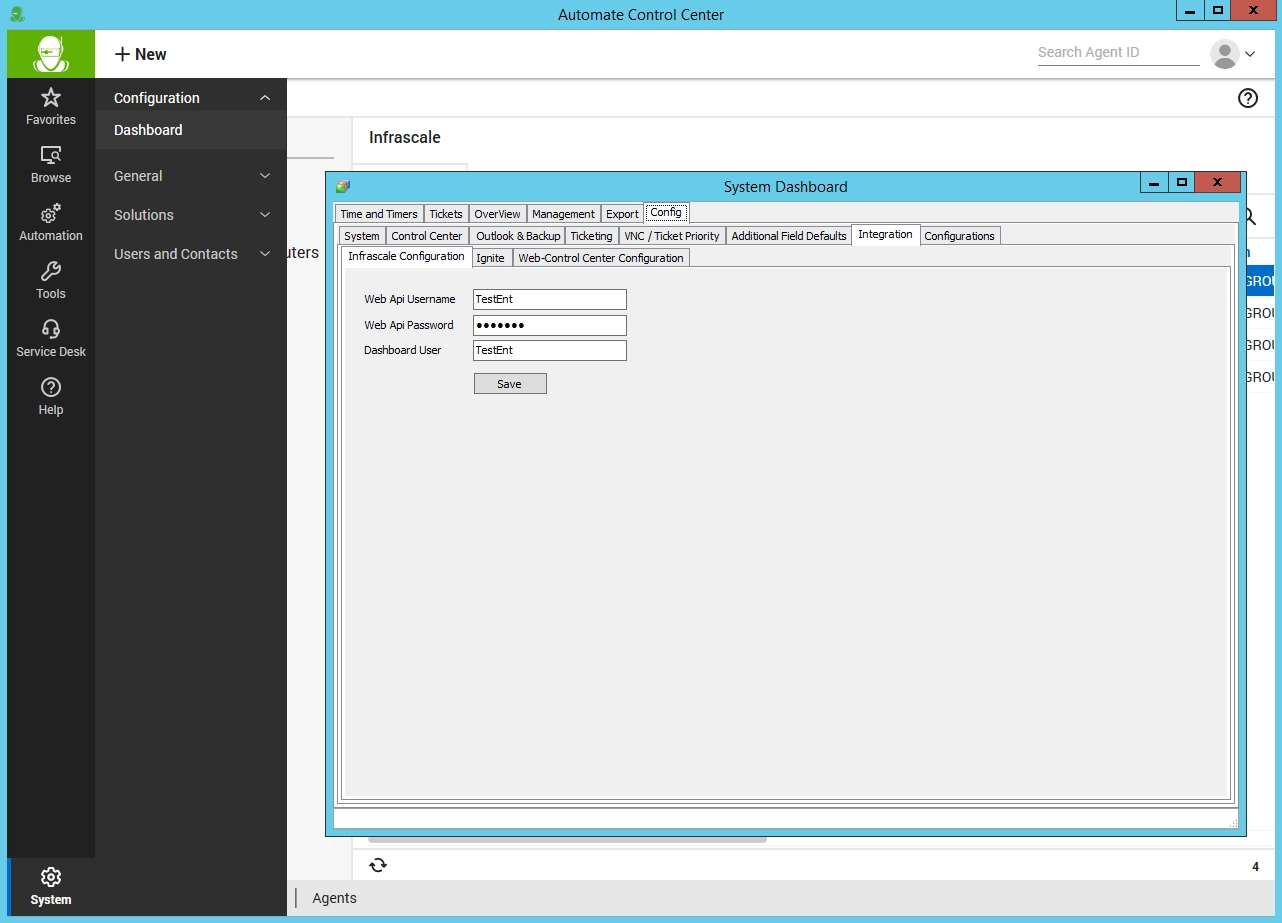
On the ConnectWise Automate server, open Automate Control Center.
Click System › Configuration › Dashboard.
Go to Config › Integration › Infrascale Plugin Configuration tab:
In the Web API Username box, enter your API username.
In the Web API Password box, enter your API password.
Currently, there is no automatic way to obtain API username and password. To get those, please contact Infrascale Support.
In the Dashboard User box, enter your Infrascale Dashboard username.
Click Save and close Automate Control Center.
Restart any open Automate Control Center instances to apply the settings.
Pre-configure automatic backup agent deployment
To be able to automatically deploy the backup agent to the computers in ConnectWise Automate clients, you have to add an extra step to the ConnectWise client onboarding script:
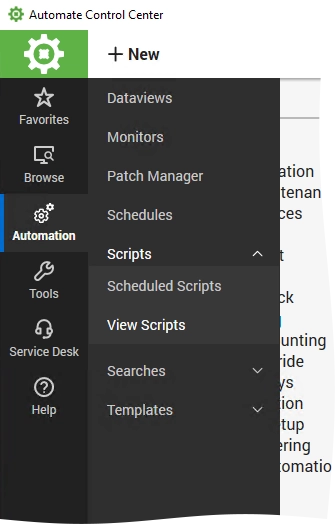
On the ConnectWise Automate server, open Automate Control Center.
In the main menu, click Automation › Scripts › View Scripts.
Click Scripts › _System Automation › Onboarding.
In the list of scripts, open Initial Software Install – Partner.
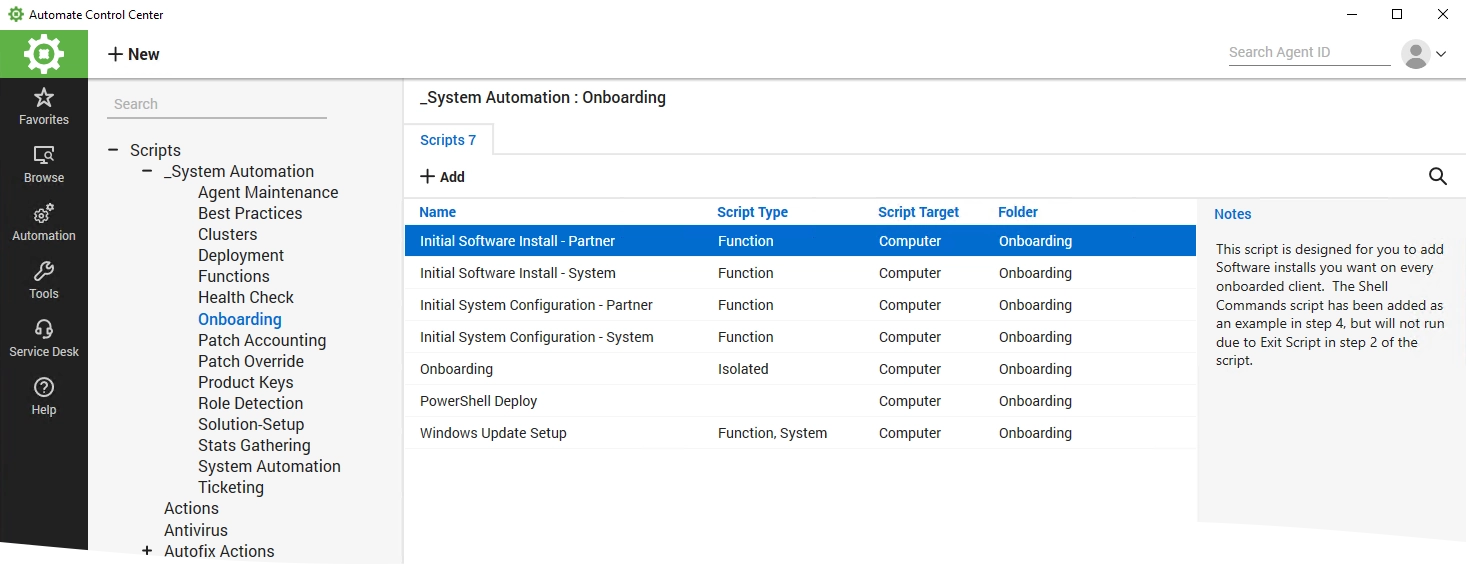
Right-click in the table of statements, and click Add.
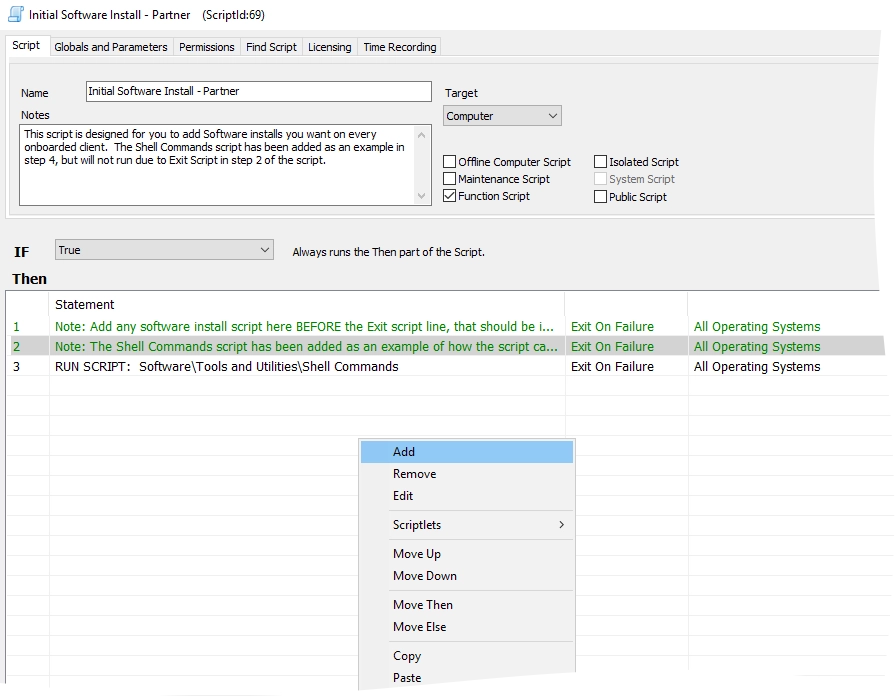
In the Function drop-down list, select Script Run.
In the Script ID drop-down list, select Backup and RecoveryInfrascaleInitial Infrascale Backup Agent Install.
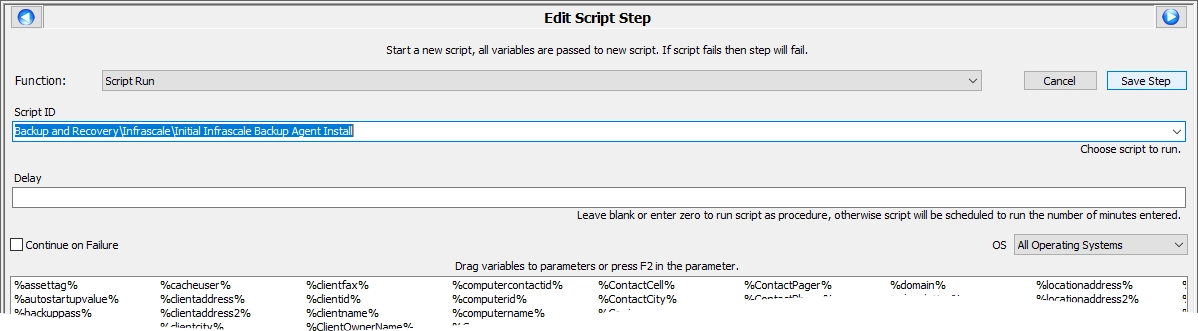
Save the step changes, and then save the changes to the script.
Map clients and companies
After providing the integration credentials, you have to match the clients in ConnectWise Automate with the companies in the Infrascale Dashboard.
On the ConnectWise Automate server, open Automate Control Center, and go to Browse.
On the Clients tab, right-click the name of a client, and then click Open.
On the Infrascale tab, from the Infrascale Company (Client) drop-down list, select
an existing relevant company to match, or
Create New to create and match a new company.
Optionally, you can also select Auto-install backup agent during onboarding to deploy the backup agent to each computer within the client, and to create new backup accounts for each user.
Click Save Mapping.
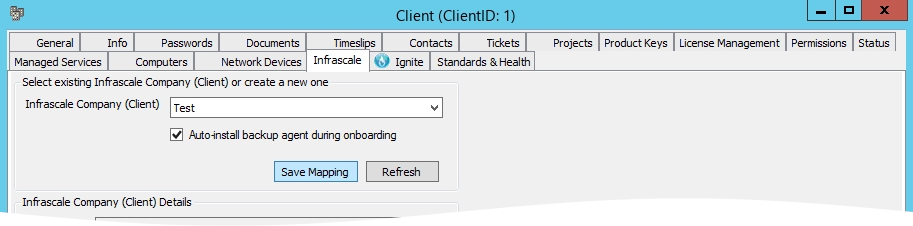
For existing Infrascale companies, information in the Infrascale Company (Client) Details and Policy and MSI groups is pulled automatically from the Dashboard.
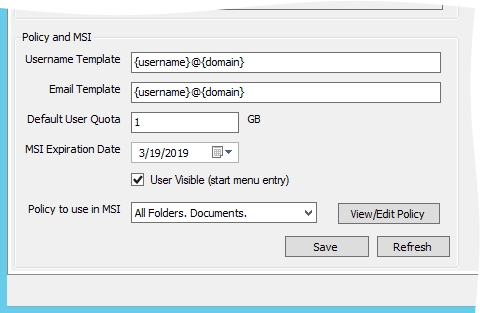
Configure backup account and policy settings
Integration allows you to configure the default backup account and policy settings to be used when deploying the backup agent and creating new backup accounts. These settings are also available when creating a custom installation package in the Infrascale Dashboard.
On the ConnectWise Automate server, open Automate Control Center, and go to Browse.
On the Clients tab, right-click the name of a client, and then click Open.
Go to the Infrascale tab, and change settings in the Policy and MSI group as needed.
Username Template
Specify the template for the usernames of the backup accounts created after installation of the backup agent.
You can specify the template literally (for example,
user), or using the predefined variables ({username},{domain}, and{machinename}), or using the combination of those (for example,user@{domain},{username}@company,user@{machinename}, and so on).Variable Description {username}Name of a Windows user the backup agent is installed under {machinename}Name of the device the backup agent is installed on {domain}Name of the Windows domain the device belongs to Email Template
Specify the template for the contact email addresses of the backup accounts created after installation of the backup agent.
You can specify the template literally (for example,
user@company.com), or using the predefined variables (for example,{username},{domain}, and{machinename}), or using the combination of those (for example,user@{domain},{username}@company.com, oruser@{machinename}).Variable Description {username}Name of a Windows user the backup agent is installed under {machinename}Name of the device the backup agent is installed on {domain}Name of the Windows domain the device belongs to Default User Quota
Set the amount of space in the cloud (in GB) to allocate to each backup account created after installation of the backup agent.
MSI Expiration Date
Set the date the installation package expires and cannot be used any longer.
User Visible (start menu entry)
Select this so the users can see the installation process and further activities of the backup agent. Otherwise, all of those will run in the background and not be visible to the users (including entries in the Start menu).
Policy to use in MSI
Select a backup policy to assign automatically to the backup accounts created after installation of the backup agent.
Click Save to apply changes.