Introduction
IBDR Direct Client is a lightweight Disaster Recovery solution designed for endpoint machines. It enables users to perform full DR image backups directly to the cloud without relying on a physical appliance or on‑premises backup unit. This provides a simple, efficient, and appliance‑free approach to protecting endpoints and ensuring quick recovery in the event of data loss or system failure.
Supported platforms: Microsoft Windows 10 and later versions, as well as Microsoft Windows Server 2012 R2 and later versions.
Installation
-
Sign in to your account in the Dashboard.
-
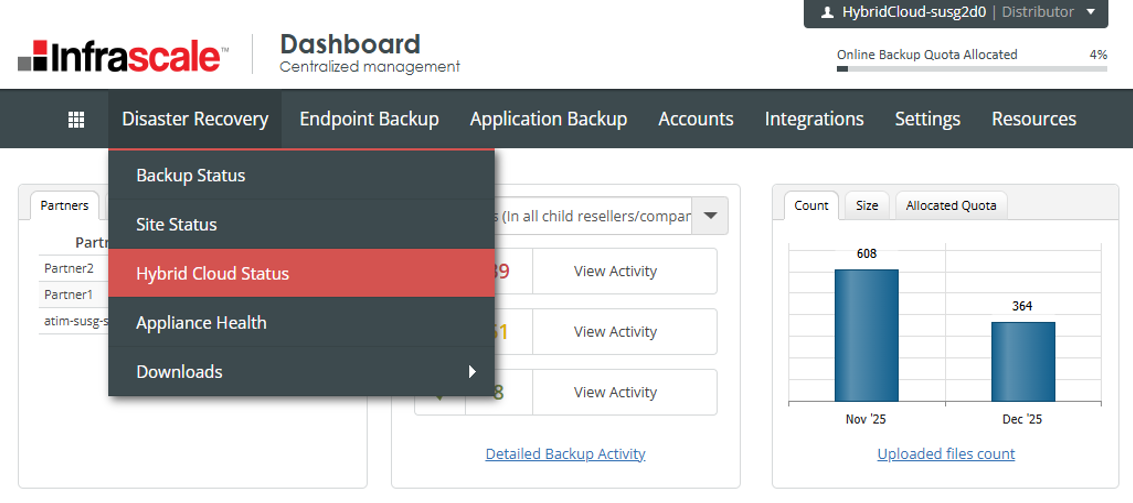
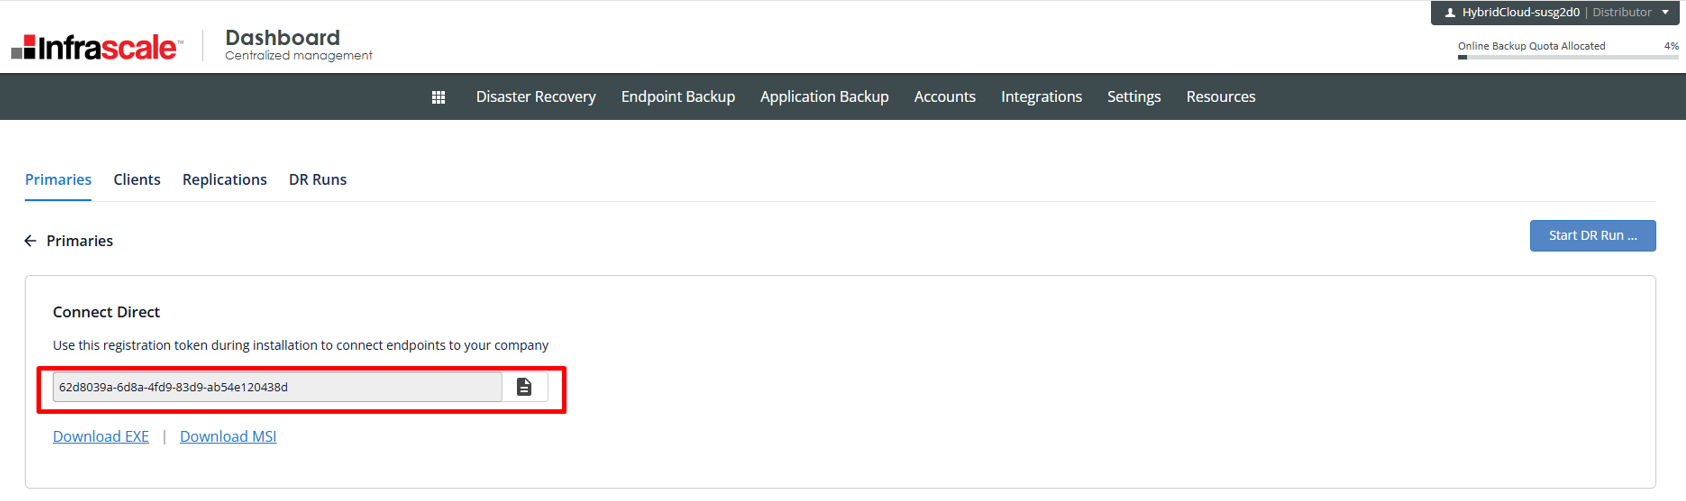
Navigate to Disaster Recovery › Hybrid Cloud Status.
-
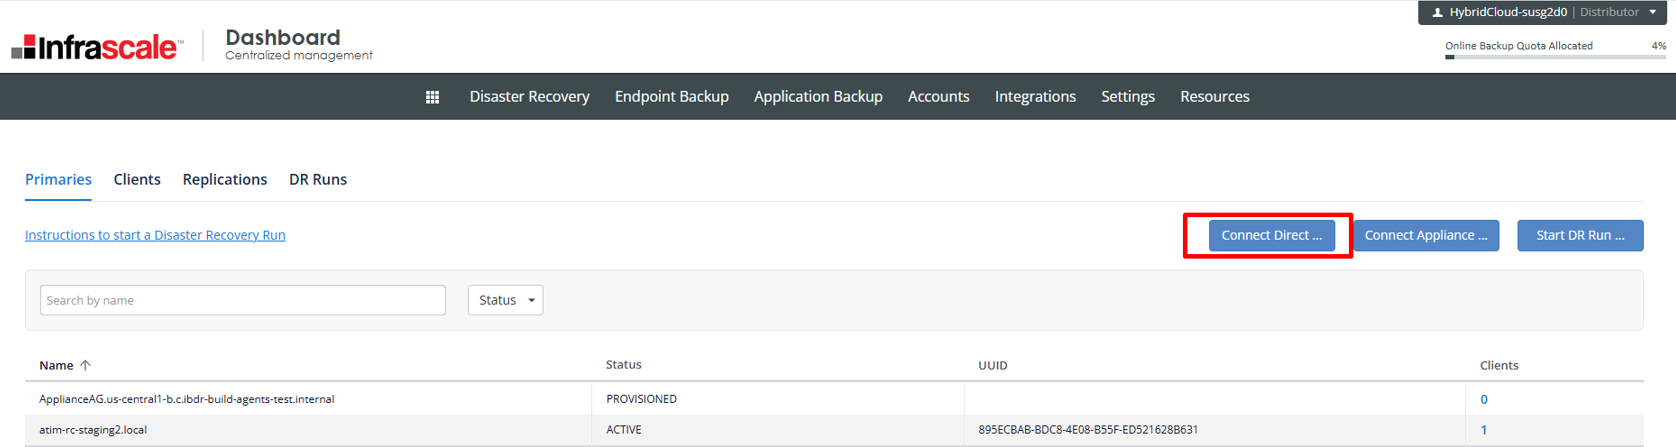
Click on ‘Connect Direct’
-
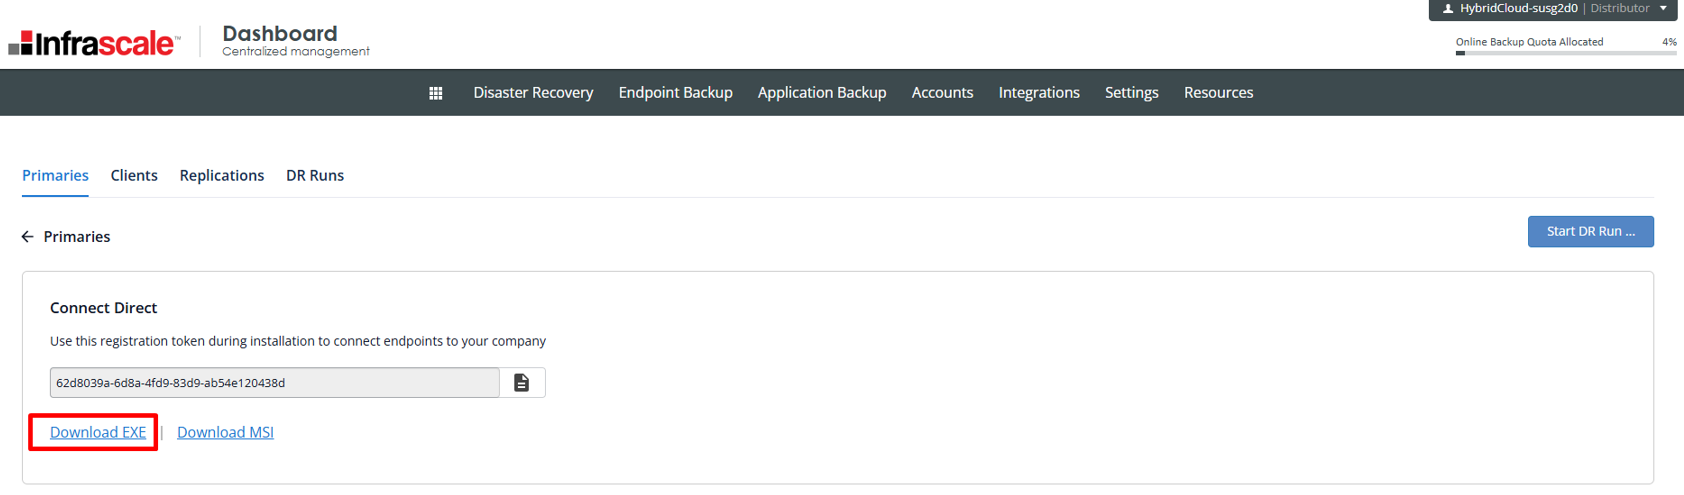
Download the EXE installer
-
Copy the registration token displayed on the same page, as it will be required during the installation
-
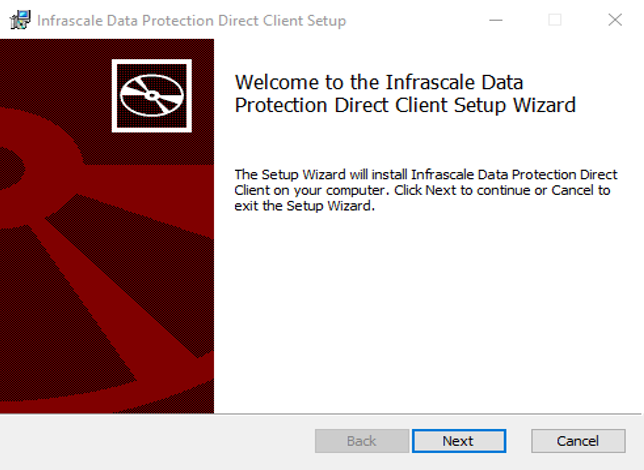
Run the EXE installer on the endpoint machine. When prompted, enter the registration token copied earlier.

-
Proceed with the installation by clicking the ‘Next’ button.
-
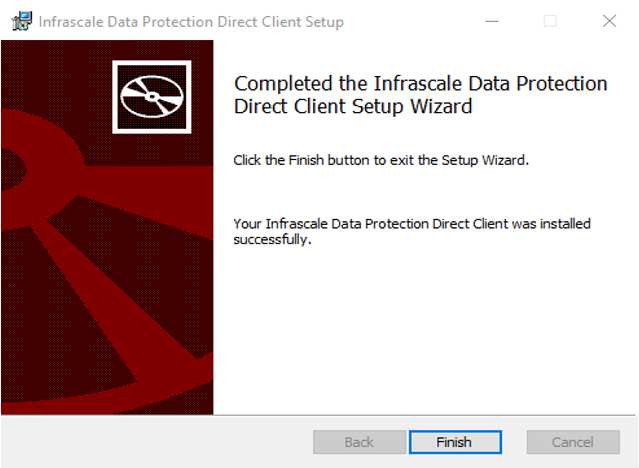
Complete it by clicking the ‘Finish’ button.
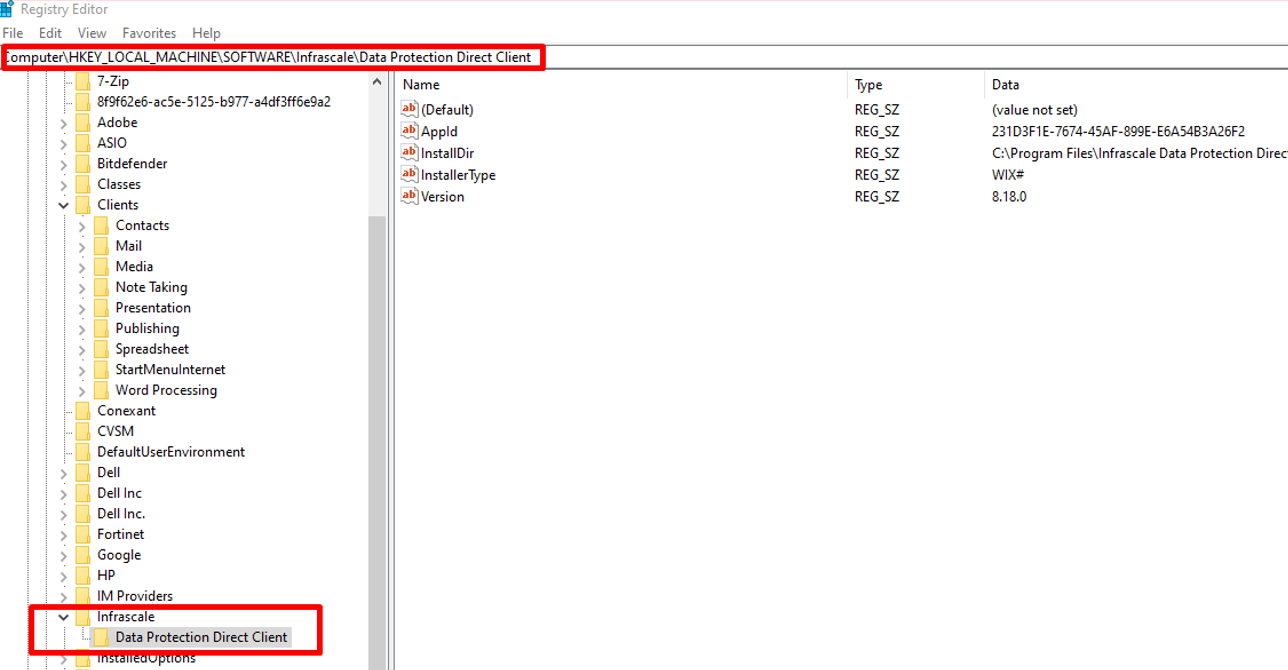
Note: After installation, open Registry Editor (Run › regedit) and verify that the application is listed under: HKEY_LOCAL_MACHINE › Software › Infrascale › Infrascale Data Protection Direct Client:
Configuration
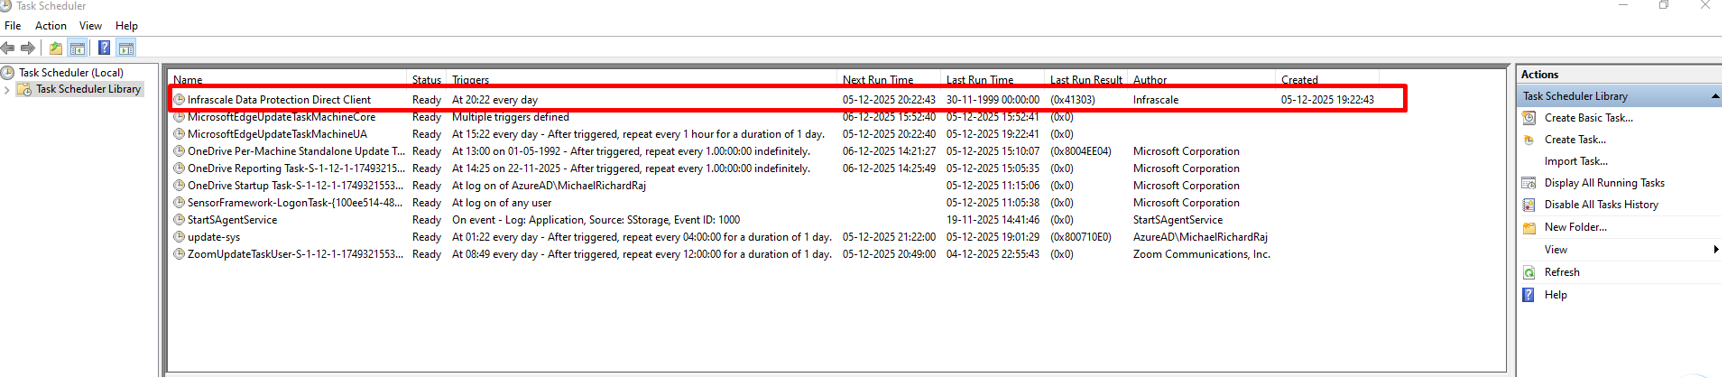
- Launch Task Scheduler from the Start menu. You will find a task named ‘Infrascale Data Protection Direct Client’:
- Right‑click the task and select ‘Properties’.
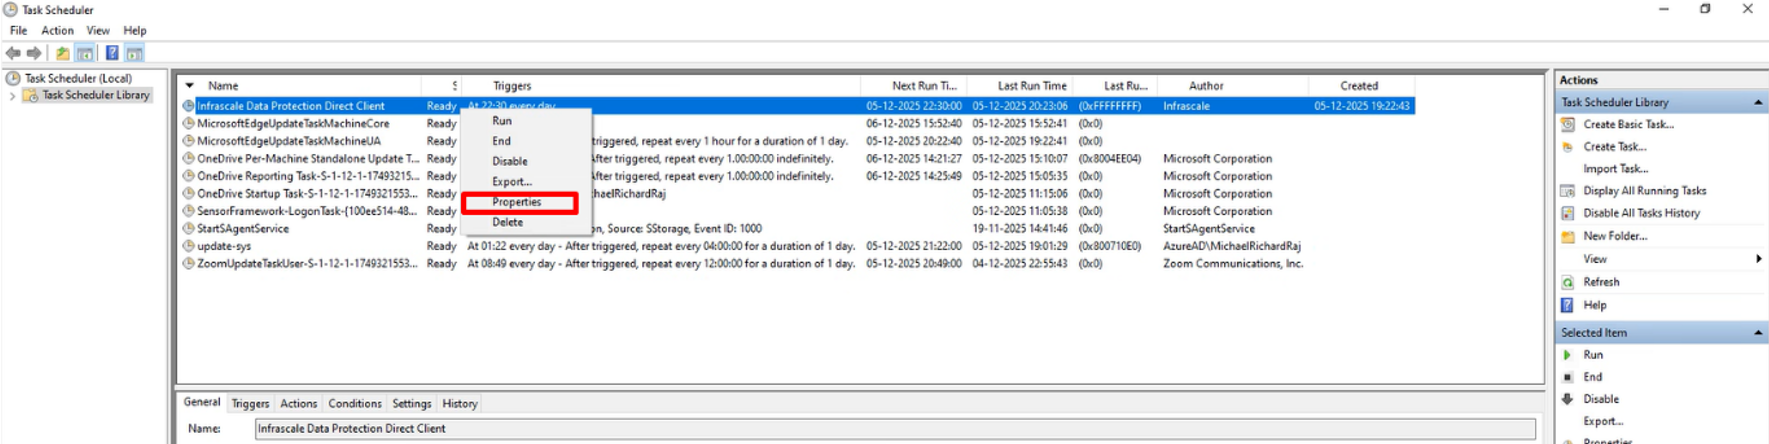
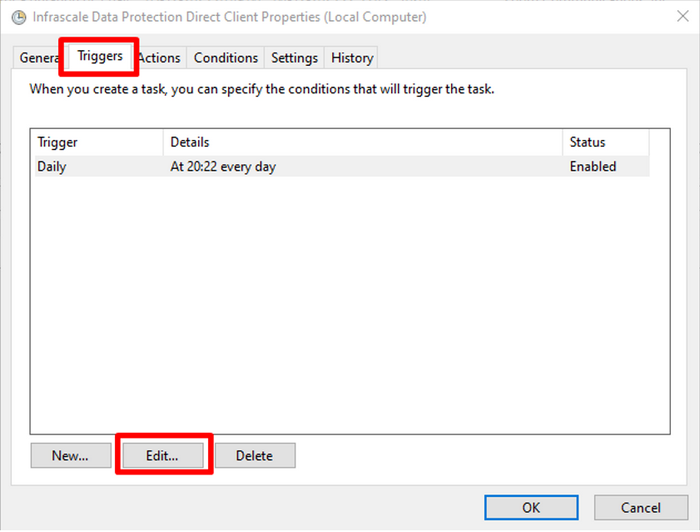
- Under the ‘Triggers’ tab, click ‘Edit’
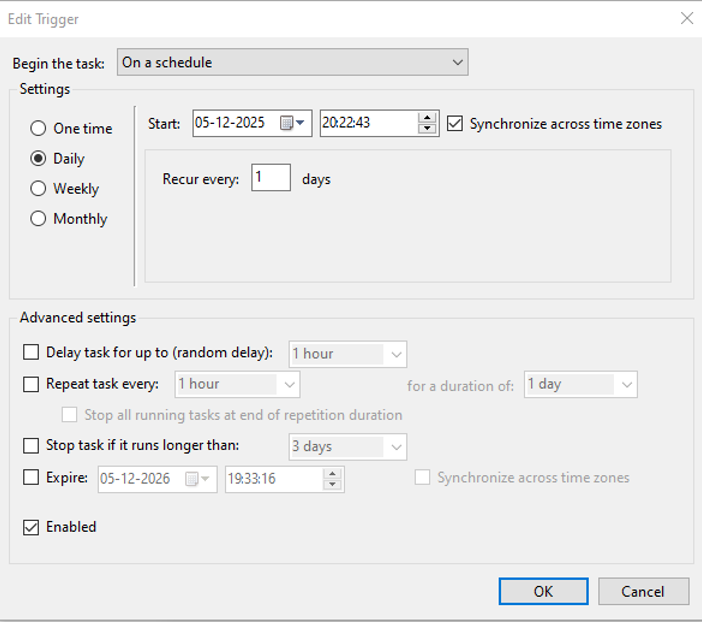
- Configure the backup schedule as required and click ‘OK’. The backup process will now run automatically according to the defined schedule
Note: To run a backup manually, right‑click the task (‘Infrascale Data Protection Direct Client’) and select ‘Run’.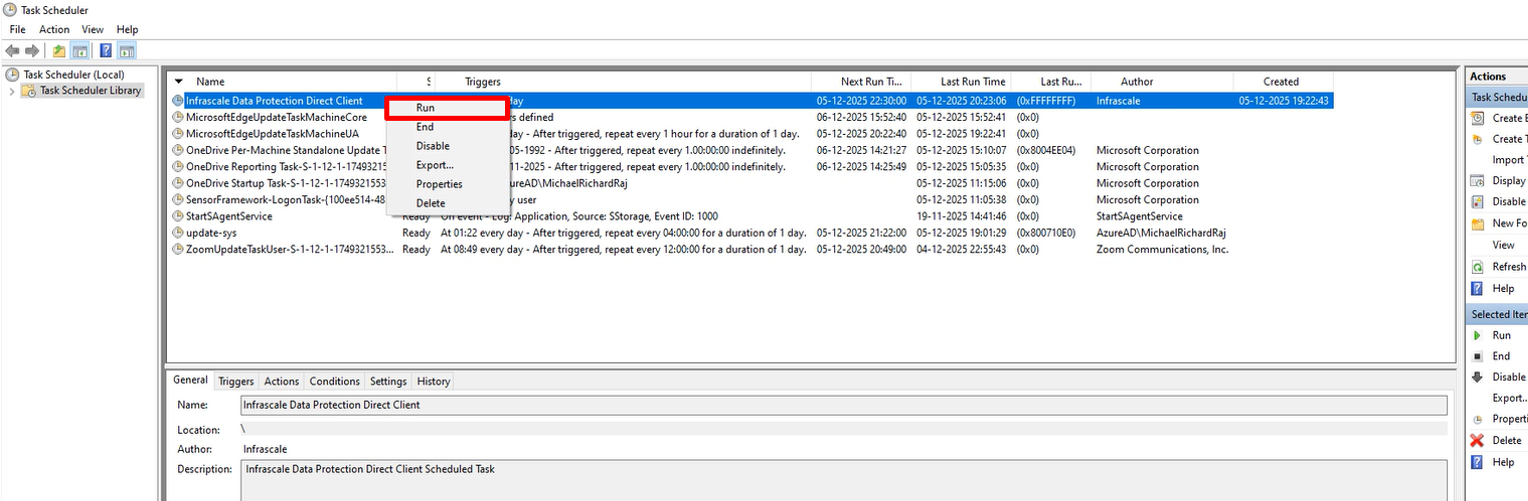
The following optional command-line arguments can be used on the Actions tab when configuring a scheduled task.
-f, –force-full Force full backup.
-i, –include-volumes Comma-separated list of volumes to include. By default all volumes are included.
-e, –exclude-volumes Comma-separated list of volumes to exclude.
–vss-provider Explicitly set which VSS provider to use while taking VSS snapshot.
–machine-name Machine name. Current %COMPUTERNAME% is used by default.
–temp-dir You may set temp dir explicitly. In other case %TEMP% is used by default.
–upload-min-th (Default: 1) Min number of upload thread.
–upload-max-th (Default: 8) Max number of upload thread.
-v, –verbose Enable verbose output.
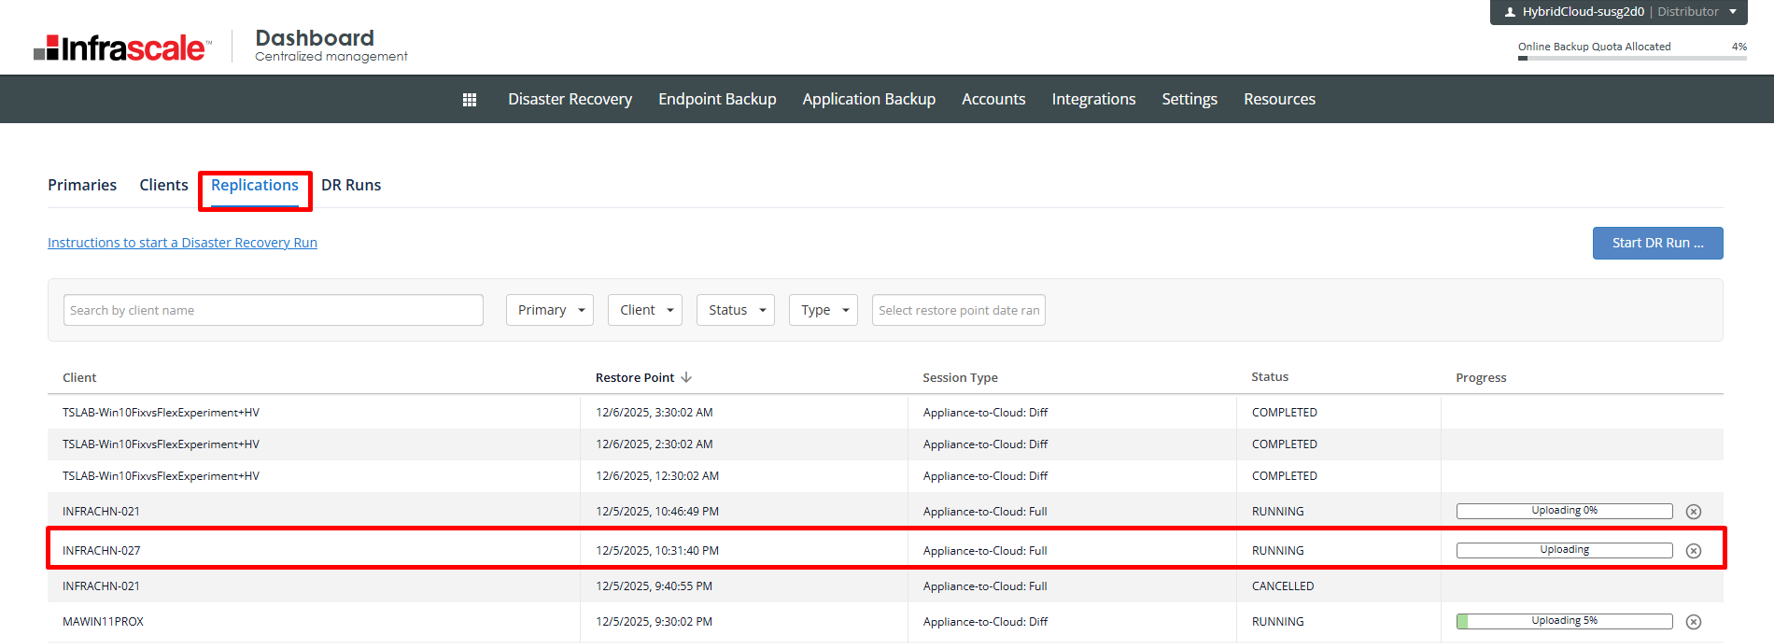
-q, –quiet Enable quiet mode. - Once the backup is initiated, you can monitor its progress in the Dashboard by navigating to Disaster Recovery › Hybrid Cloud Status › Replication